
Have you looked at some yoga poses and thought you’d never be able to nail those? Well, even as a yoga teacher I also haven’t mastered certain poses. And that’s absolutely alright.
Within yoga, we have to be aware that not all of the asanas are actually going to be suitable for us. And this has nothing to do with flexibility or strength. Our bodies are different in minuscule ways that may affect what we will be able to do physically.
This means that you absolutely don’t have anything to feel guilty about when we are talking about using the hacks that will be explained in this article.
It gets even better, sometimes it might even be batter to use some tricks to get into a pose.
Why? You say.
Well, it’s very easy. Within yoga, the alignment of an asana is actually more rewarding than going into a position the wrong way. The latter might actually be harmful to your body and cause injuries.
Therefore, if you are physically not possible to get into a pose, don’t force anything and don’t break your head over it! Because this is basically what yoga is about. Easing your mind, rather than going into a fake perspective of perfection.
But now, let’s have a quick look at some great tips you can use.
What do I need for these yoga tricks?
Well, as we are talking about hacks, I also need to add that these are only achievable with the use of props. In this article, I will use blocks and a wall.
If you don’t have any blocks yet, they’re quite easy to find and they are inexpensive.
Lately, I’ve done a workshop with Big Booty Yoga owner Kady Lafferty. Who said that she heard once someone called props tools. This suggests that the props are an extension of you, rather than being a prop.
It’s not a widespread name, unfortunately, but I hope it will. As props are becoming more acceptable within any yoga practice. Sometimes even unmissable.
So, don’t be afraid to turn to a yoga tool! Your alignment will be really grateful.
And if you don’t believe me, try it yourself. Do a pose, deliberately make sure you are not properly aligned. Yes, you may exaggerate a bit. Then do that same pose with proper alignment, or by the usage of yoga props/tools.
Let’s start!
Yoga hacks using Blocks
You can get such a far way with a couple of blocks. I do recommend owning two blocks though. One time I even owned about 5 blocks. Three foams and two corks! But that was complete overkill of course. Although…
I think when it comes down to hacks, blocks are the best possible tool to use within your yoga practice. I mentioned that you can also use a wall, and we will, but sometimes it’s not possible to use though. Like when you are in a yoga class.
Let’s dive into a couple of poses for you to find the proper alignment and also to work on strength.
Balancing Poses
Balancing poses are great to use a couple of blocks. They’re great if you aren’t always so stable on your mat. And it might be because of any kind of reason. You might have balance issues from a certain illness or stress. Meaning that it might be hard to find the middle point or the point where you find your balance.
So, if that sounds like you, then it might be good to support yourself on a couple of blocks. Yeah and that’s all it takes basically.
Even on blocks, I’ve seen people having a hard time keeping their balance, but it does give you some support and it will be easier than flying solo.
And this is not the only thing why these blocks are great for. They’ll also help with your alignment.
Getting into Half Moon Pose (Ardha Chandrasana)
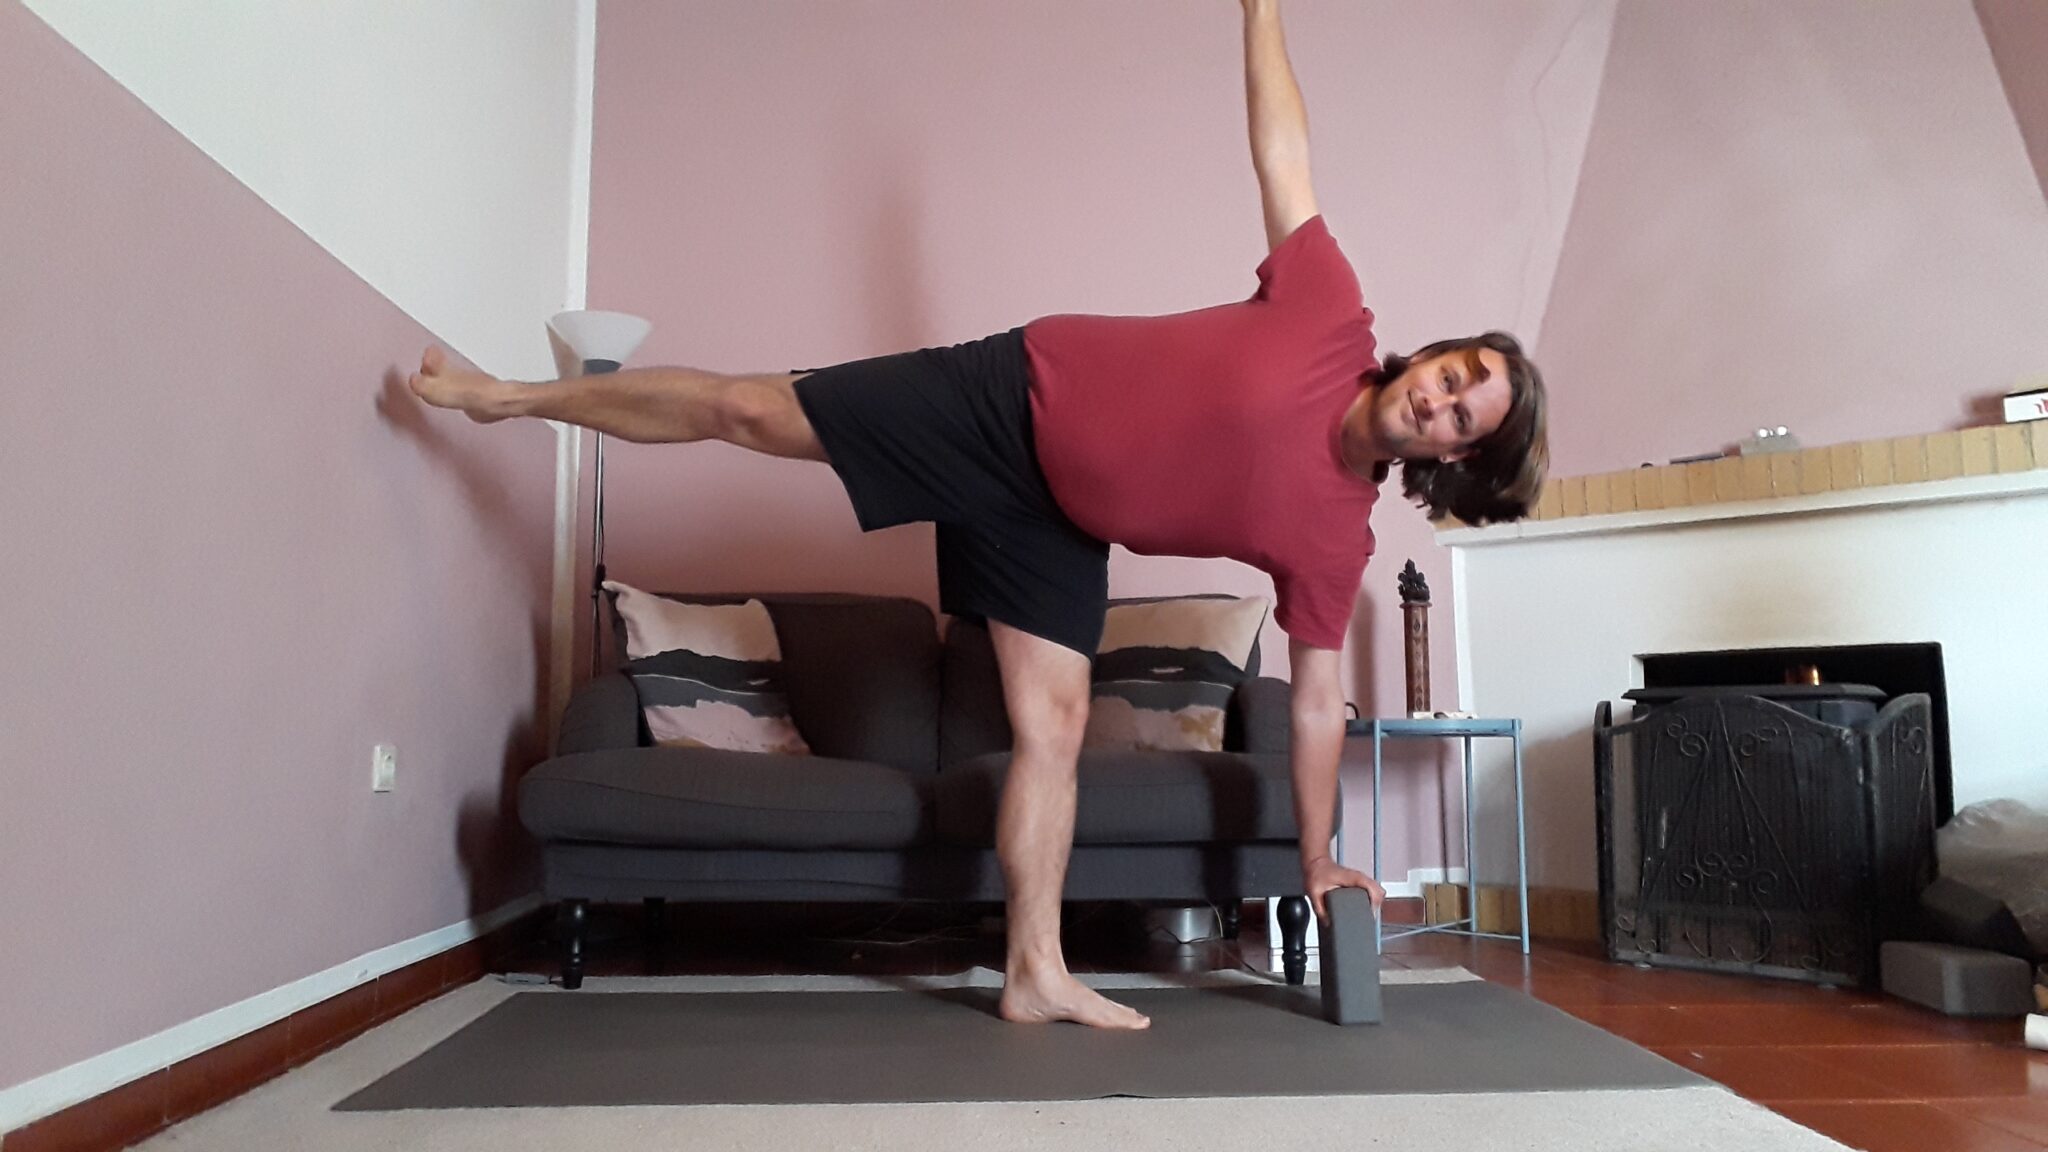
For example, within Half Moon Pose, you will reach for the floor. However, if you have shorter arms (like me), you might lose your alignment. Within Half Moon pose we want to keep our spine as straight as possible and make sure that our spine is within line of your raised leg.
And of course, we want this shape as we are also going into a twist within this pose. Therefore it’s really important that the spine is as aligned as possible.
Typically you’d want to get a perfect T shape, with the top of the T being bigger than the leg.
This will be easily achieved while using a block. Even I still use it as I know that my shape will suffer when I don’t.
Arm Poses
You might not expect it, but you can also increase your arm strength with blocks. And they are absolutely amazing if you are looking forward to do some crazy yoga poses.
Yeah some people might find that they are tricks and cheats, but it’s just part of the practice. You’ll train your arm strength and at some point you might be able to put your blocks aside.
Look at it as floaters when you are learning to swim. Without them, you might drown and when you master the technique and you train your arms, you’ll learn how to stay afloat!
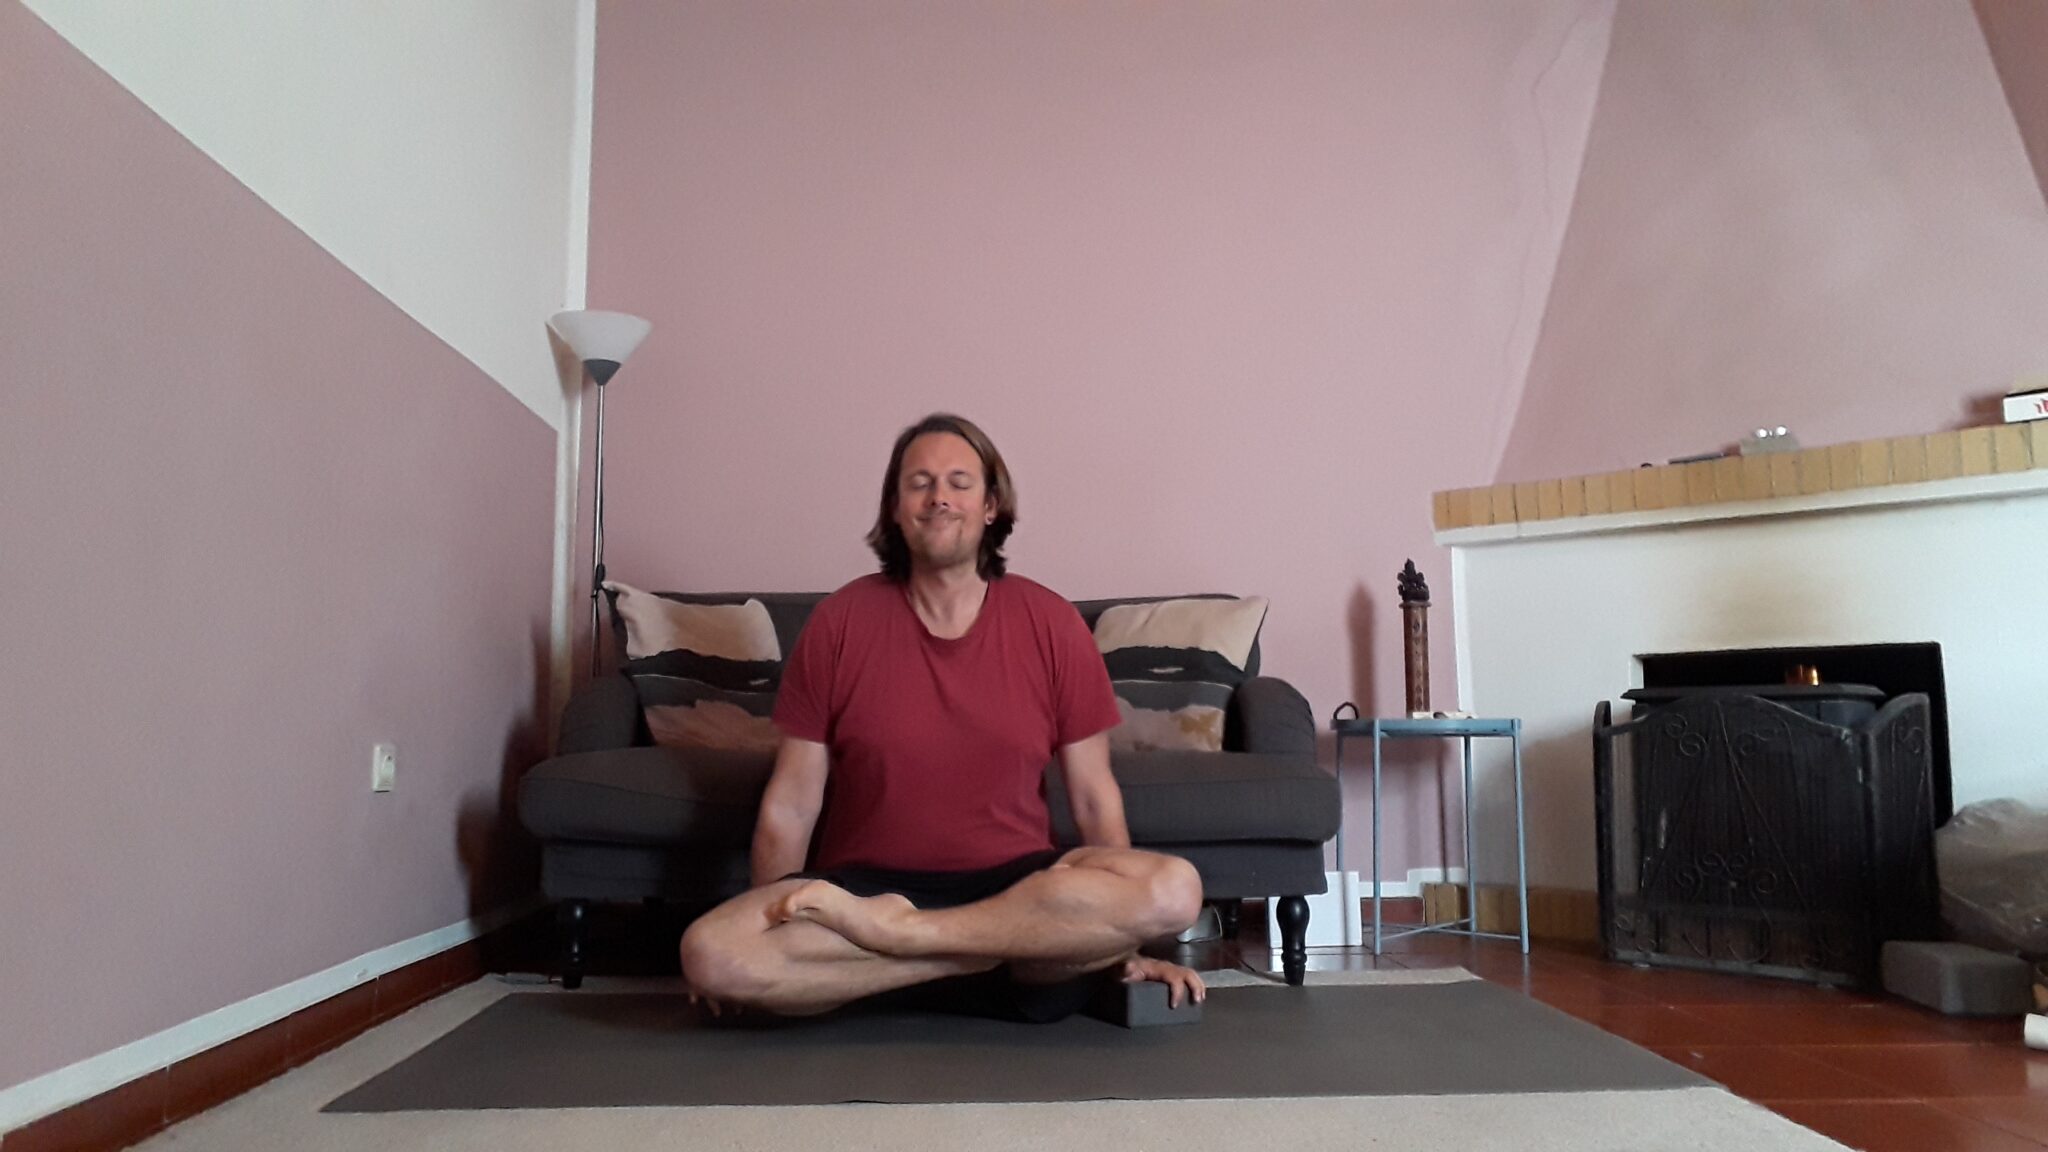
Getting into Scales Pose (Tolasana)
Tolasana used to be one of my goals. Especially to go into full lotus and stand on my hands. And then I figured out that my arms were to small to push myself up.
Luckily one of my teachers gave me a great hack that made it possible for me to get into this asana.
It’s not that hard, and you don’t have to go into full lotus if you don’t want to.
You just put a block on each side of your hip. You stay cross-legged or go into lotus pose and you push yourself up!
If you aren’t able to push yourself up just yet, because you are still training those triceps and biceps, then you might place one foot into the mat to push along with your hands. This way you get a success experience and you are one step closer getting into the full position!
Yoga Hacks using a wall
We all have walls, but not all walls are safe walls. What do I mean by saying this? Well, if you want to use the wall to do your hacks it might be a good thing to make sure that you are able to do it safely.
I always recommend having a wall that’s at least a couple of meters or feet wide with nothing next to it. Making sure you’re having a clear wall means that you will be able to get into a position without the hazard of injuring yourself.
And in the studio it might be a bit harder to use as well as you might have to fill up a spot in the middle of the floor. But don’t worry, you don’t need the wall for a crazy amount of asanas.
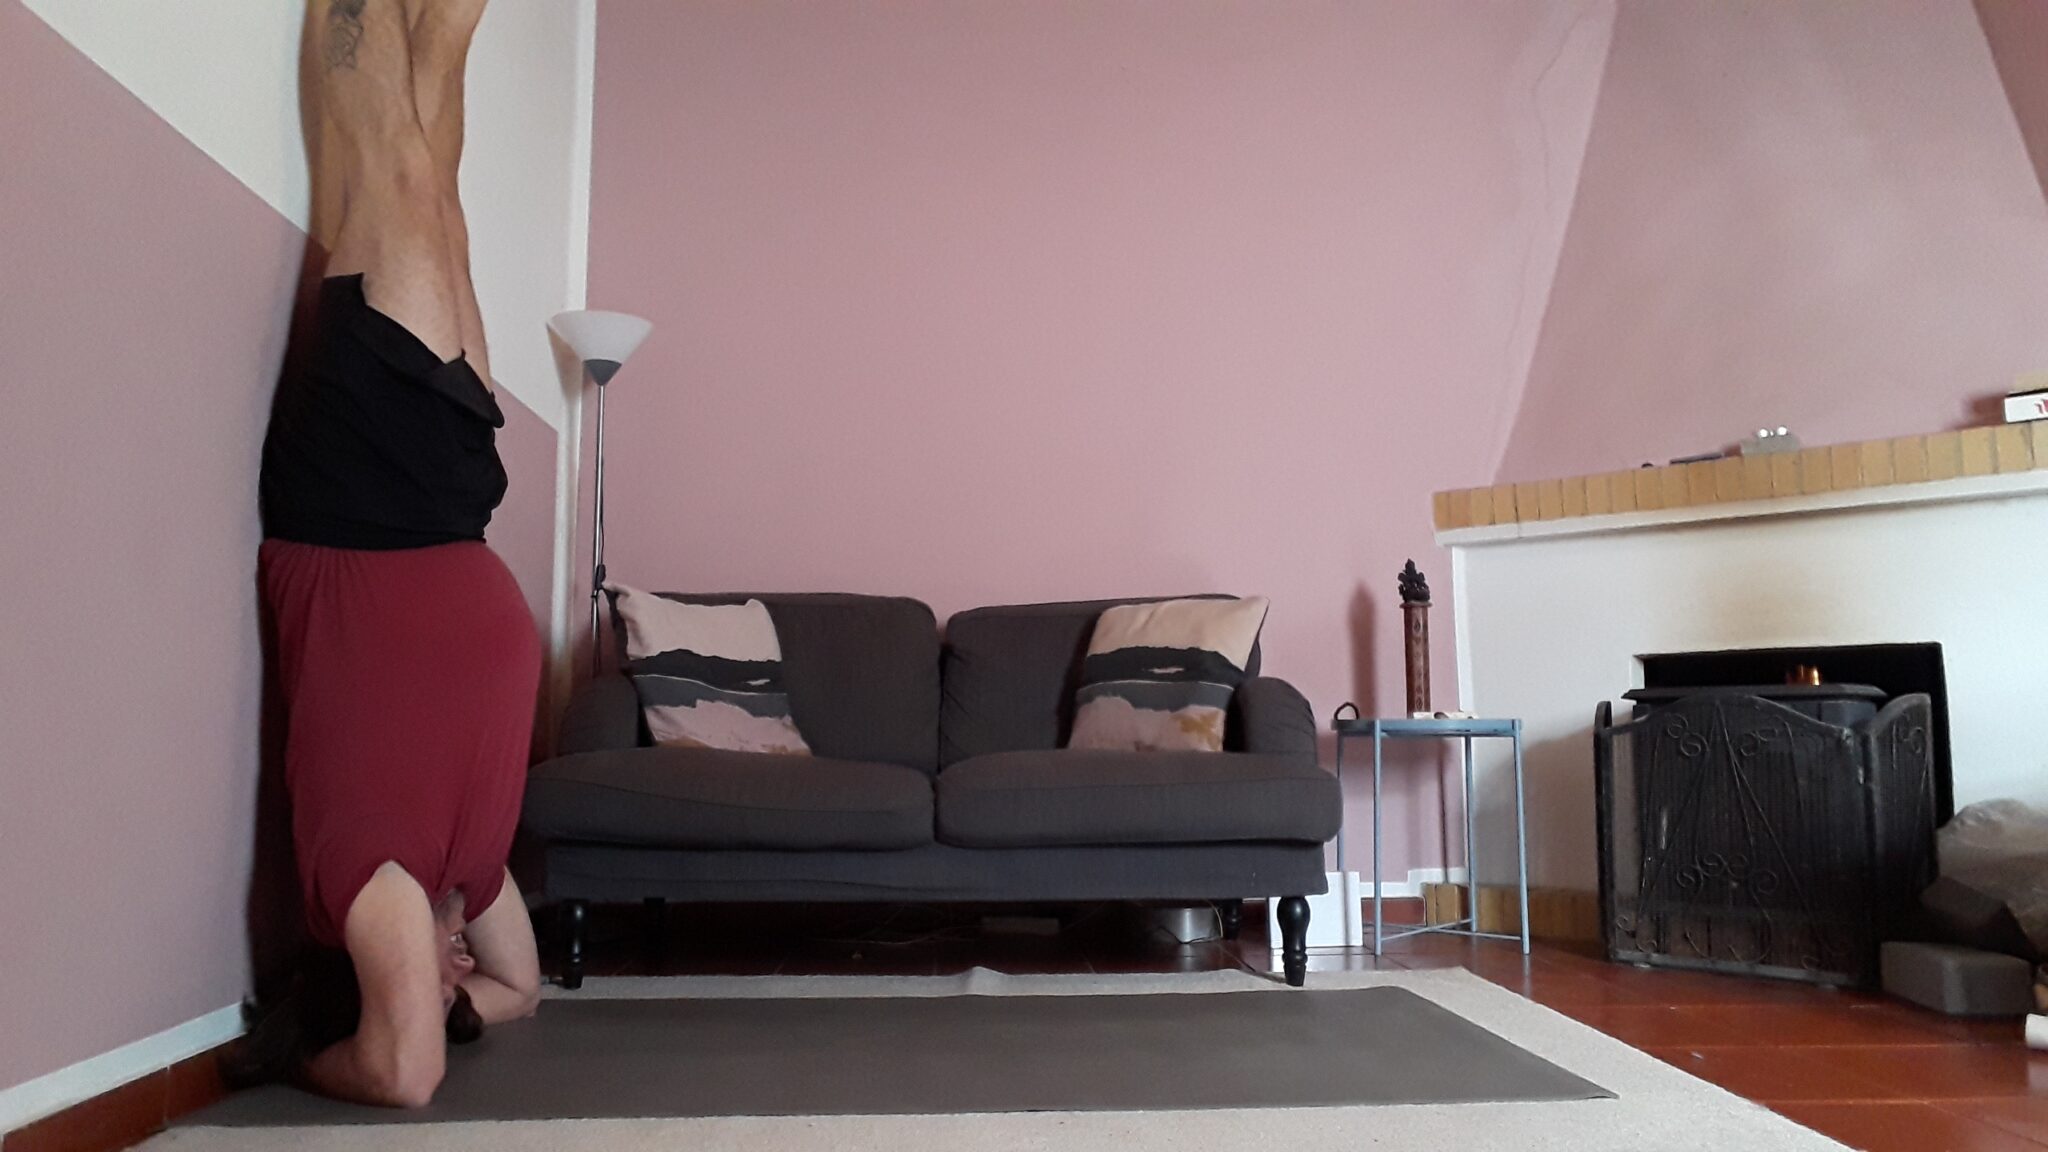
Inversions
Inversions are always great poses to use a wall for. I’m even willing to say that when you have a wall, even beginners can go into a lot of inversions.
With this little trick it’s simple and safe to get onto your head. In the beginning you do have to make sure that you are guided by someone, just to make sure that you get in and out of the pose correctly. And if you get dizzy because you’re not used to these positions, they are there to help you as well. (This doesn’t happen very often though).
Now, there are many inversions for you to choose from, but I always like to start with the headstand. It’s a great one to start with and from here you’ll be having many options to get deeper into this asana.
Getting into Headstand (Sirsasana)
Of course, there are a couple of reasons why you shouldn’t go into a headstand. If you are having any blood pressure issues, it might better not to get into an inversion. Make sure you consult your physician before doing any inversions.
Now, we’ve passed the disclaimer, so let’s have a look at how to get into Sirsasana.
Position yourself near the wall, with your head facing it.
Before you put your hands on the floor, make sure that you bring your arms together, grasping your elbows with opposite hands.
This way, you know how wide your arms need to be when you are going into headstand.
Place your arms on the mat and release the elbows and bring your hands together next to the wall.
After that, put the back of your head into your hands. The crown of the head on the mat.
Bring your feet into the mat, kind of like a downward facing dog. And gently walk your way toward your head. When you can’t go anymore, it’s time to get into the inversion! You lift your legs up until they reach the wall.
And that’s how it goes!
To get out of the position, you just gently lower your legs until they reach the floor again. Make sure you go into childs pose for a couple of breaths.
Backbends
Now, the last pose we’re going to review for our wall hacks, is a backbend.
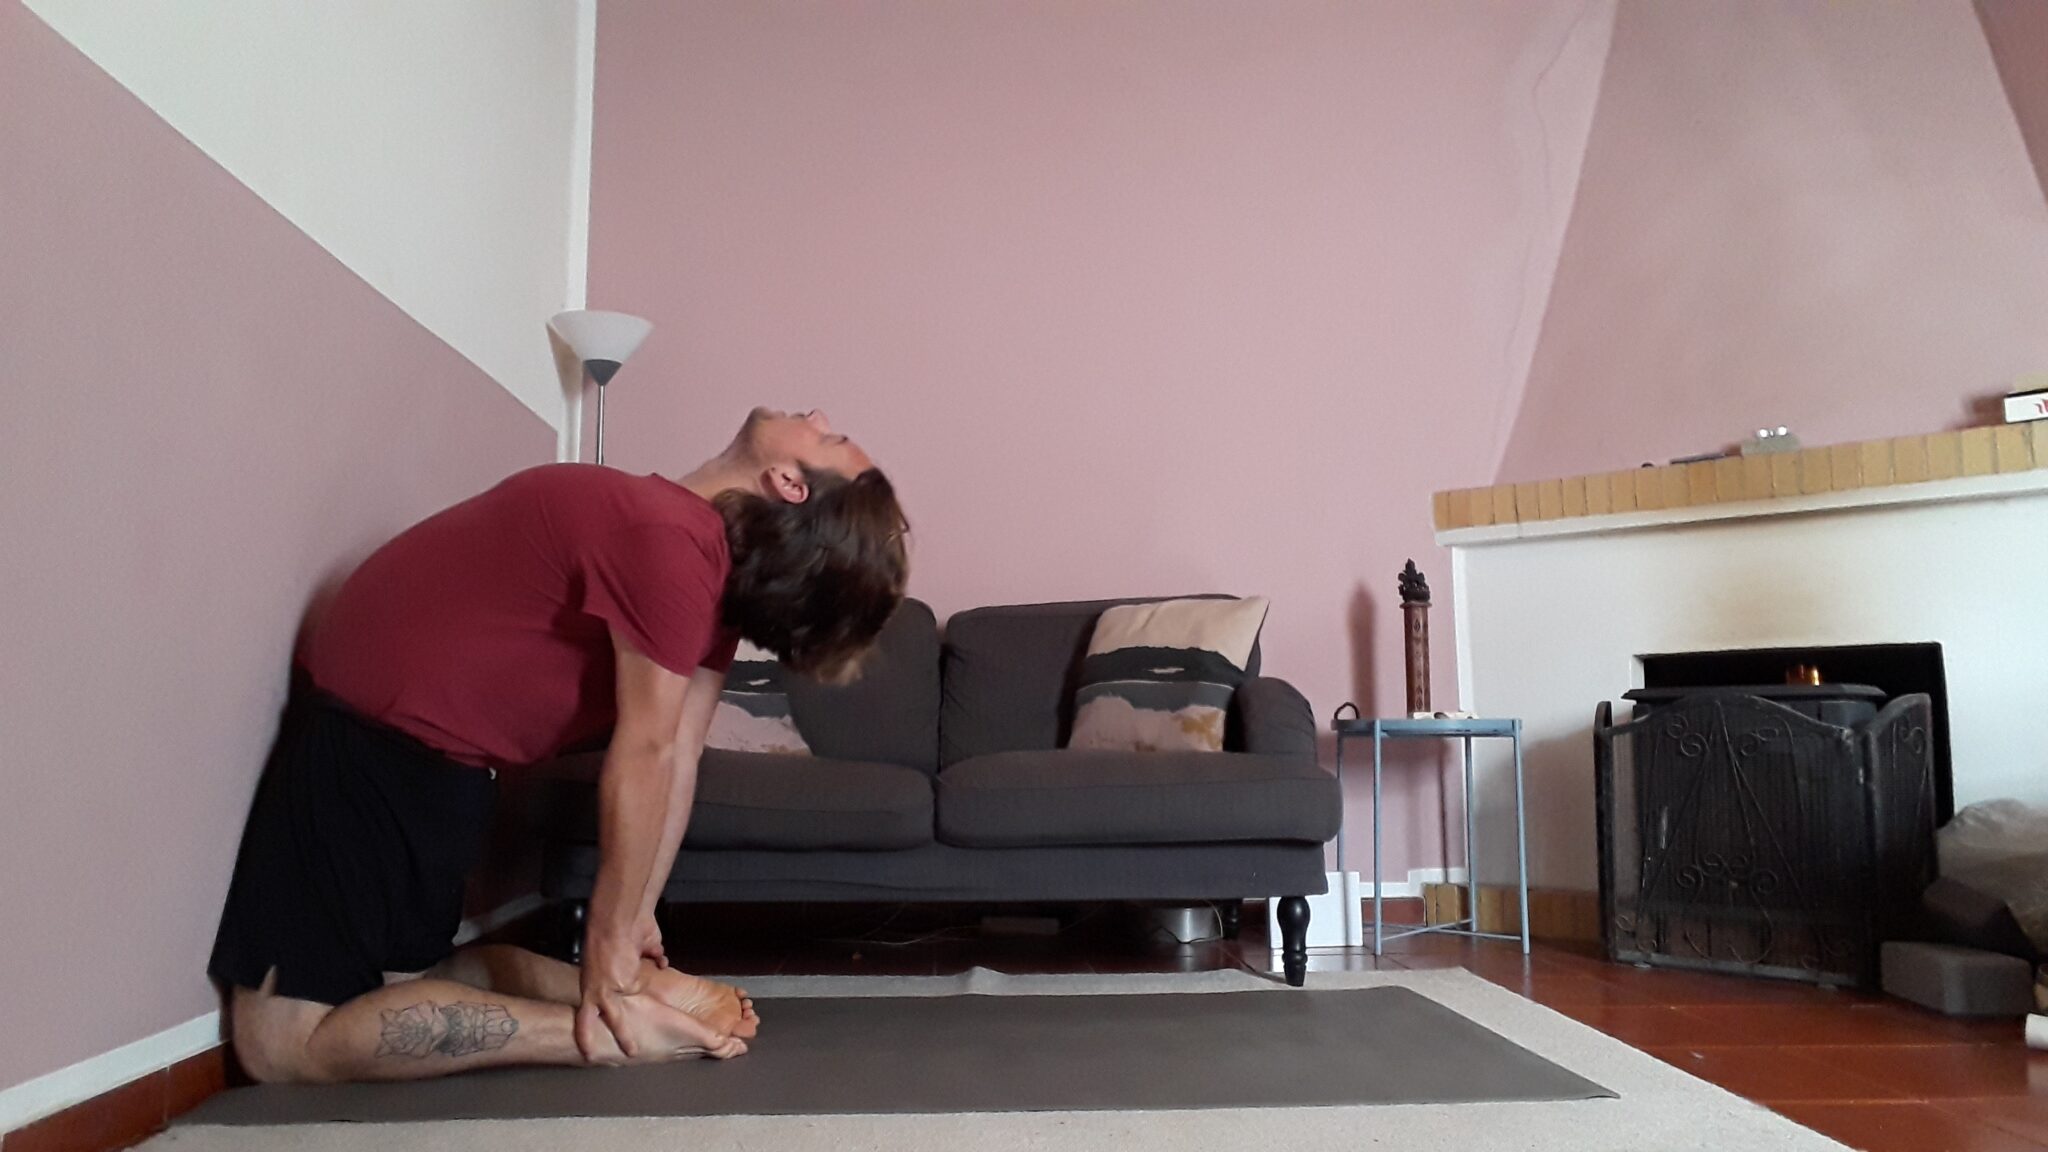
Camel Pose
Camel pose is great to do next to a wall, it makes sure that your hips are close to the wall. This way you will be aligned properly.
There are a couple of options within this pose to make sure you have something to your liking.
Let’s start with the full camel pose though. Just so we have our standard position to work from.
For this pose we’ll be starting on our knees next to the wall. Yeah, it might look like you are punished, but don’t let that get you down.
Your knees are right next to the wall, your head facing the wall too.
Then you lift your upper body up, you push your hips towards the wall. Keep them there.
Now you can bring back your upper body backwards and reach your feet with your hands.
Make sure you keep actively pushing your hips towards the wall.
To get out of the position, gently come back out of the backbend.
Then go into child pose for a couple of breaths.
Options within Camel Pose
As I mentioned before, there are a couple of options you can do.
First of all, you can do half camels. And I say camels as you have to make sure that you do both sides.
You do the exact same thing, but now you make sure that you put your right hand on your right hip. You push the hand into your hip and you raise left hand, then you bend backwards with your upper body.
This position is a bit more gentle than a full camel, and better for people who are having back issues.
After, you repeat on the other side of course.
Another option you can do, is putting your toes into the mat to get into full camel. It’s an easy trick, but it makes that you don’t have to go too deep into camel pose. You get into the position exactly the same as within camel pose, you just put your toes into the mat to make sure your heels come higher.
Alright, that’s it again for some tricks and hacks to make sure you are properly aligned within your yoga practice. This article is great for the beginning yoga, but also for the advanced yogi. It can help you get deeper into the position or you will be able to get into the position after all.
What was your favorite one and did you succeed with these tips? Let us know in the comment section down below!
Thanks for bringing us these excellent yoga hacks.
I have often seen people in these various poses and think that I couldn’t even start to do them. Now thanks to your really helpful information I feel more confident about giving them a go.
I think that knowing these hacks will help and encourage a lot more people to try yoga. They will soon see the benefits and totally surprise themselves as to what they can actually achieve.
Thank you Geoff for this amazing feedback! Let us know in time which poses you’ve mastered by using these hacks!