In my article about timing and yoga, I’ve talked about that fact that Yin-Yoga might be better to practice in the evening.
I found it was about time to practice what I preach and I came up with this lovely sequence especially for you.
This yoga practice will be focused on going to bed, and therefore you can even practice this one from the comfort of your own bed as well!
I will explain all the different asanas right here, but you can also scroll down and watch the video down below for free!
A like after enjoying the video will be highly appreciated though!
Are you looking for something in particular? Shout out to me in the comment section below and I’ll do my best to tackle the subject you requested!
Yin Yoga Sequence for Legs and Before Bed
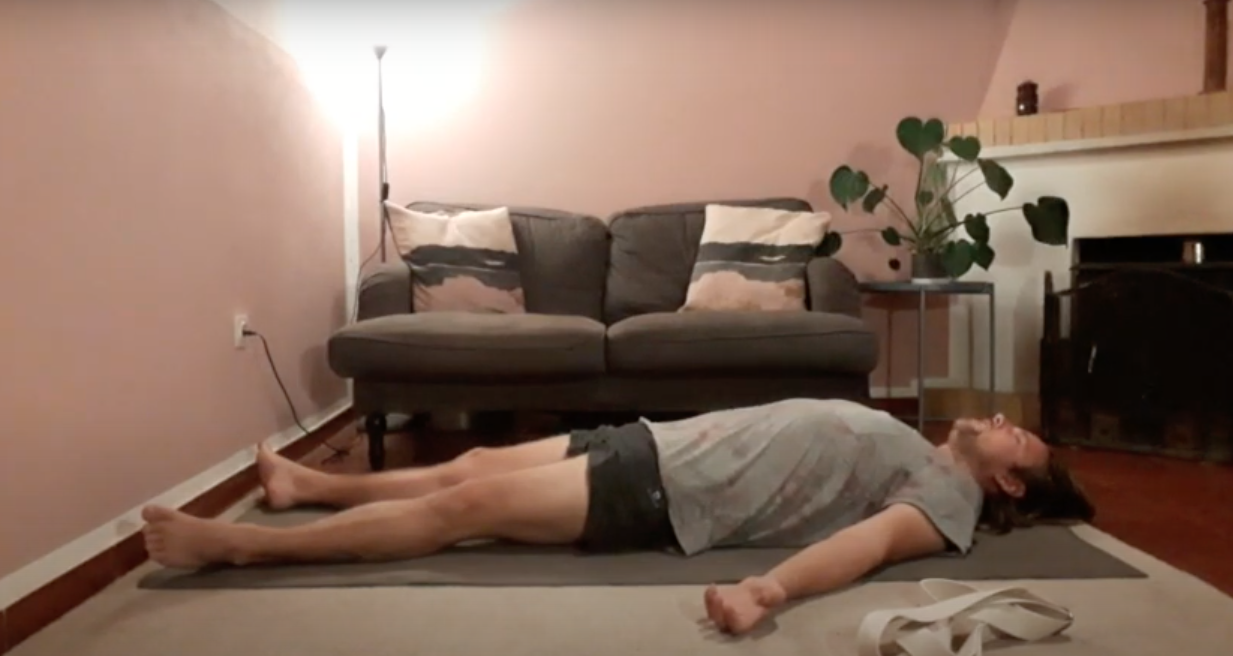
Savasana
As you can see we start this sequence in Savasana.
Sometimes it’s really great to start in this position to make sure that you can fully benefit a proper in and exhale.
While you are here, make sure that you keep on breathing with your belly. Making your in and exhales very long and deep. This way you’ll be taking more oxygen in and feeling more relaxed already from the beginning of the practice.
And especially for this night time yoga sequence, it’s great to get a full body relaxation.
You can be in this position for 5 minutes. Although, if you are already a bit sleepy, I’d suggest doing it for 3 to make sure you don’t fall asleep.
Human Hammock and Variations
In the picture, I haven’t shown the variations on Human Hammock as they are a bit vague on the image. I’ll show them here, although, I’ll also give the explanation.
This way you can see that you won’t notice the difference, but from the written cues you’ll be able to get the maximum benefit.
Let’s first start by talking a bit about Human Hammock itself.
As you can see, within this asana I’m using a strap. However, if you don’t have one lying around, you don’t need one.
In the video below I’m explaining some other options for you if you don’t have any props available at home.
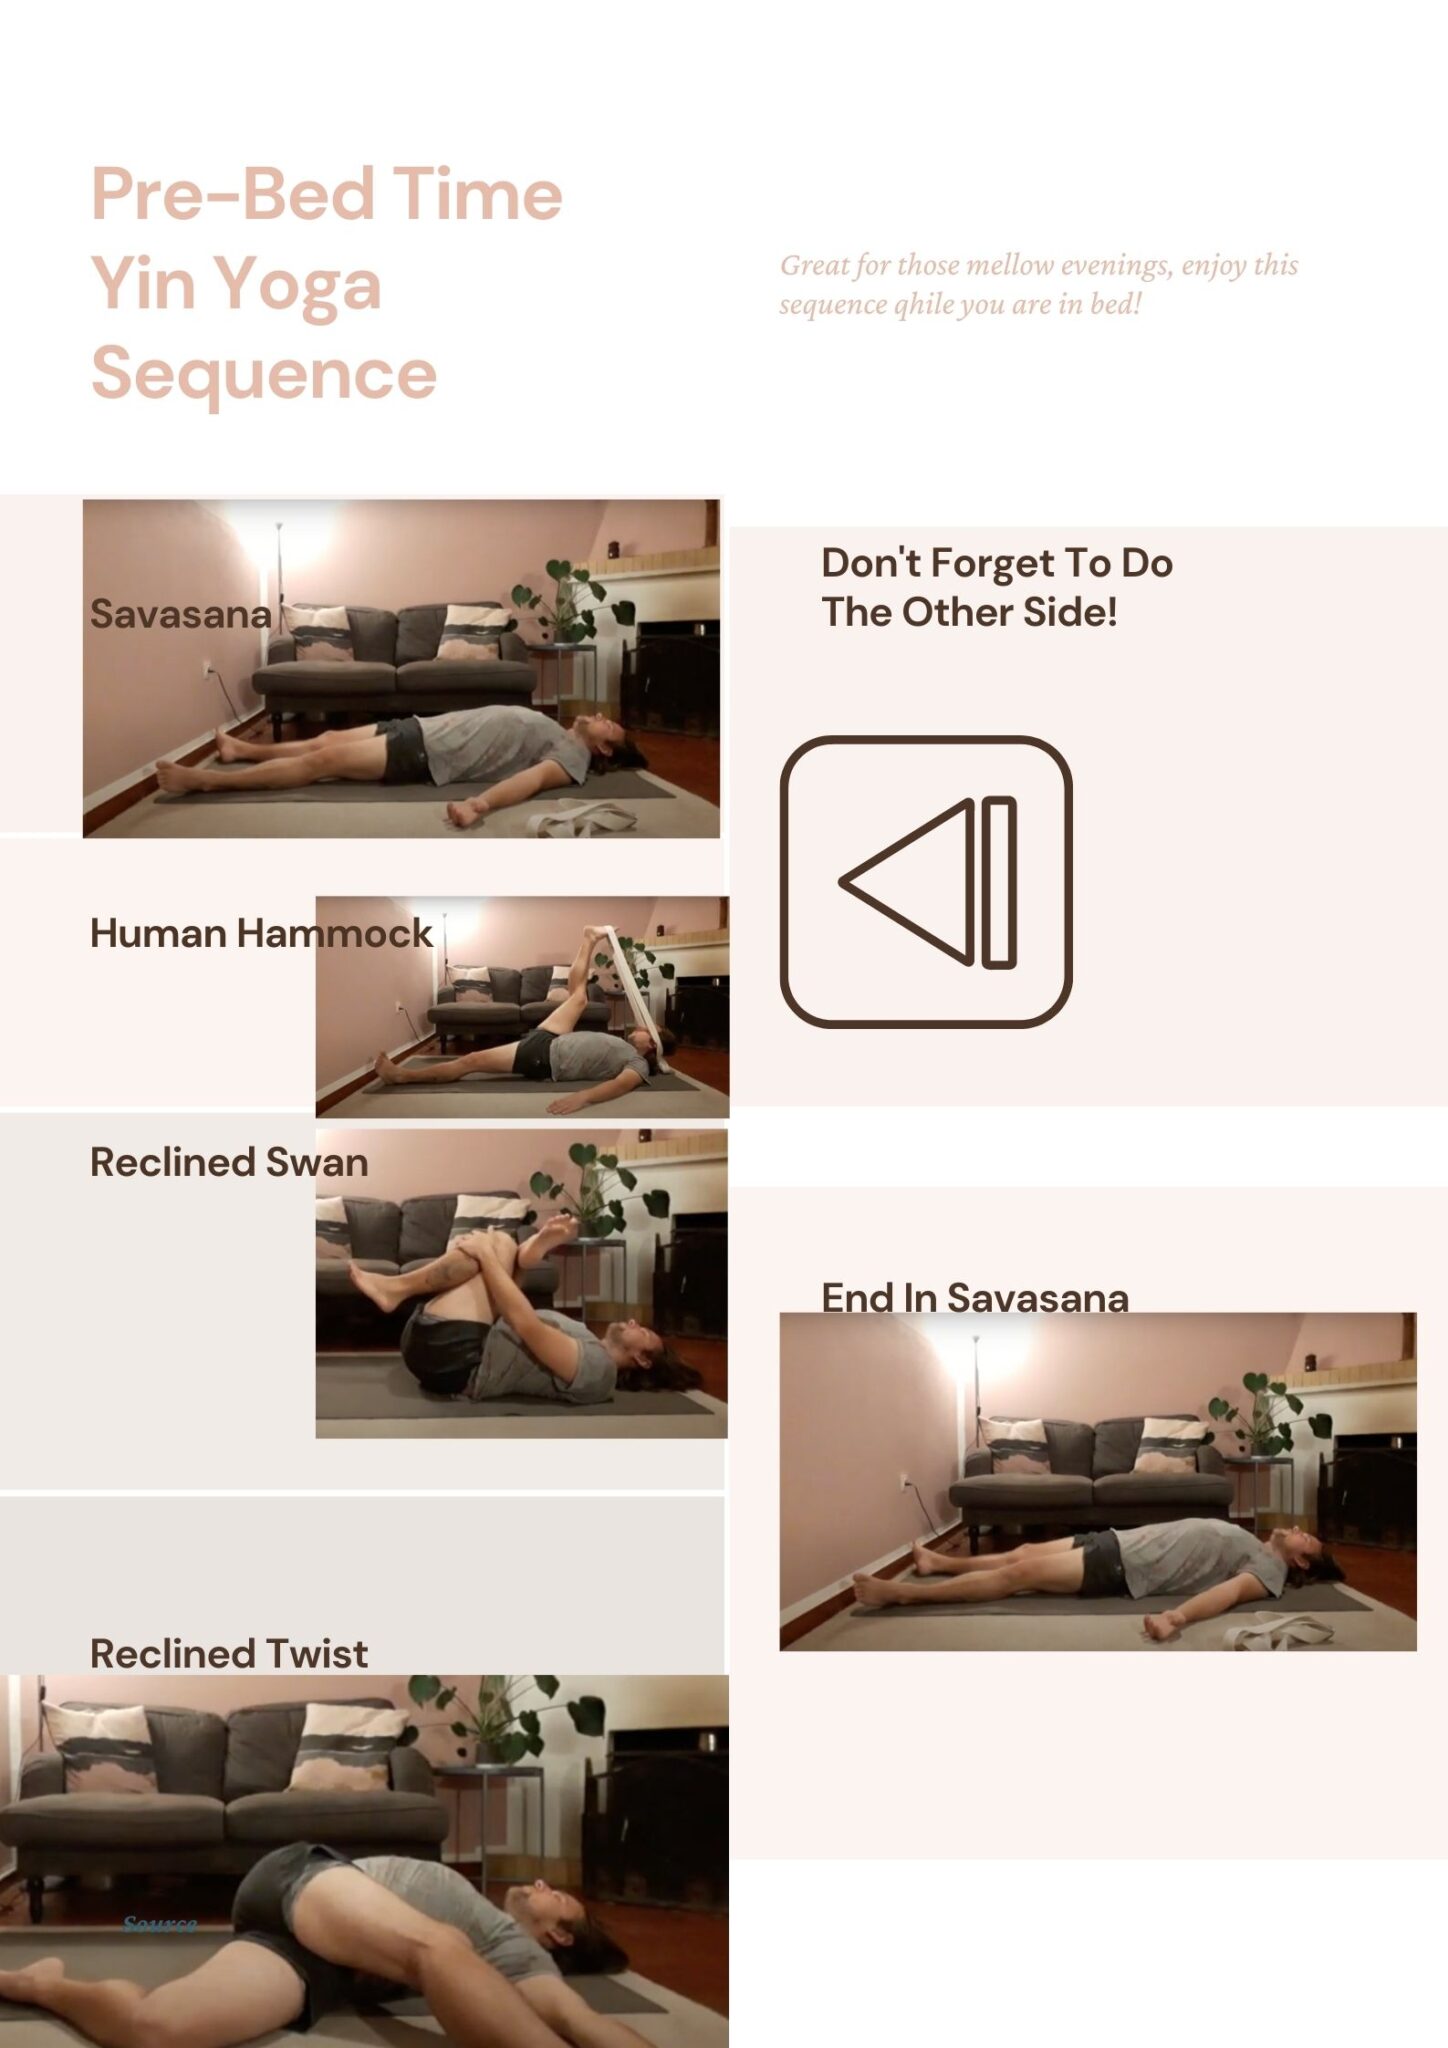
For the Human Hammock itself:
- Raise Right Leg
- Bring your strap into a loop
- Put the strap right below the toes, on the pillows of the foot
- The other end of the strap goes around the head, right above the ears
- Stay here for 3 minutes
This is the main version of Human Hammock. Let’s look at two variations as well that I’m also explaining in the video down below.
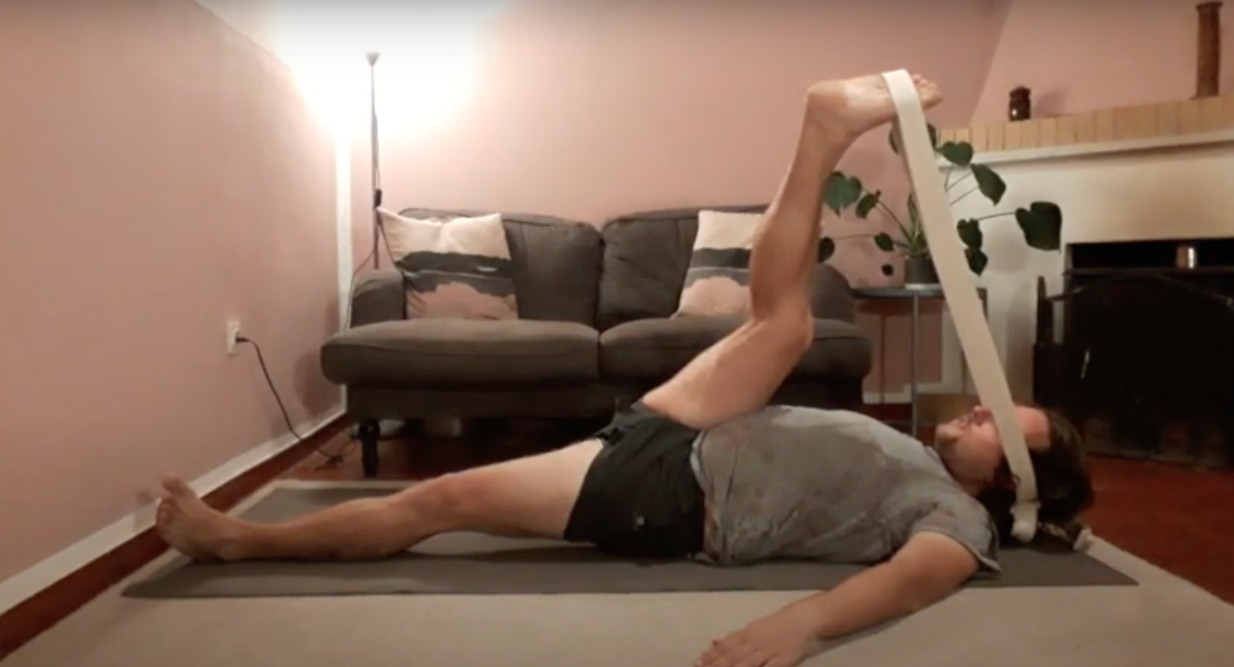
Human Hammock Variation 1:
- Bring your Right Leg a little bit over your left leg
- Not too far, just a couple of inches
- You should start to feel a burning sensation around the outside of the knee
- Be here for 2 minutes
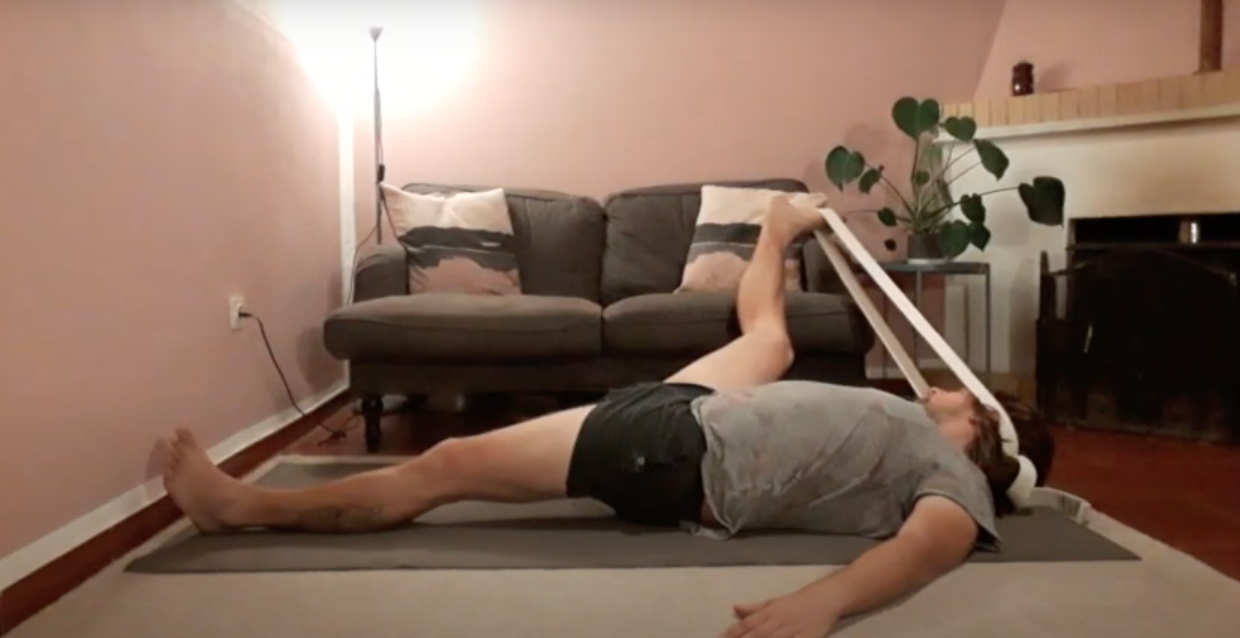
Human Hammock Variation 2:
- Lower your right leg towards your left side
- If you are still strapped in, don’t go all the way down
- Stay here for 2 minutes
After doing this little sequence, raise your right leg back up. You can release the strap now by bending your knee a little. Always first release the strap from the foot before releasing the part around your head.
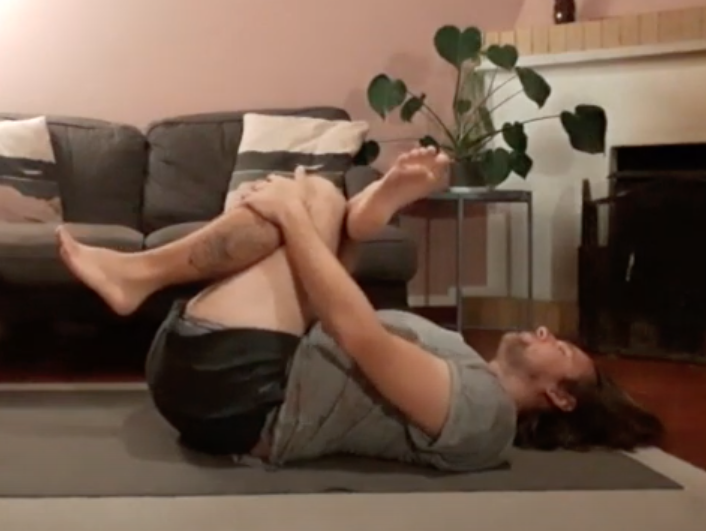
From here we’ll be going into Reclined Swan Pose. For this you can put your left foot into the mat and after that you can bring your right foot/ankle on top of your knee.
Reclined Swan Pose
This asana is a great hip opener and here you’ll be having the choice to deepen it or stay soft.
You can decide whatever you’d like what fits your energy and body at the time of performance.
If you already put yourself into position like mentioned above, great. Otherwise, read the last paragraph of the previous asana.
From here one we’ll be putting our hands around our left knee. The right hand goes in between the inside of the thighs. And the left hand goes around the outside of the left leg.
Here you an decide if you’d like to take your hamstrings or your knees.
With your right elbow, push a little bit against your right knee. This gives you more opening in the hips, if this is what you’d like at this moment.
You can stay here for about 3 minutes.
After, you can put the left foot back into the mat, releasing the hands simultaneously. Then we go on to the next position.
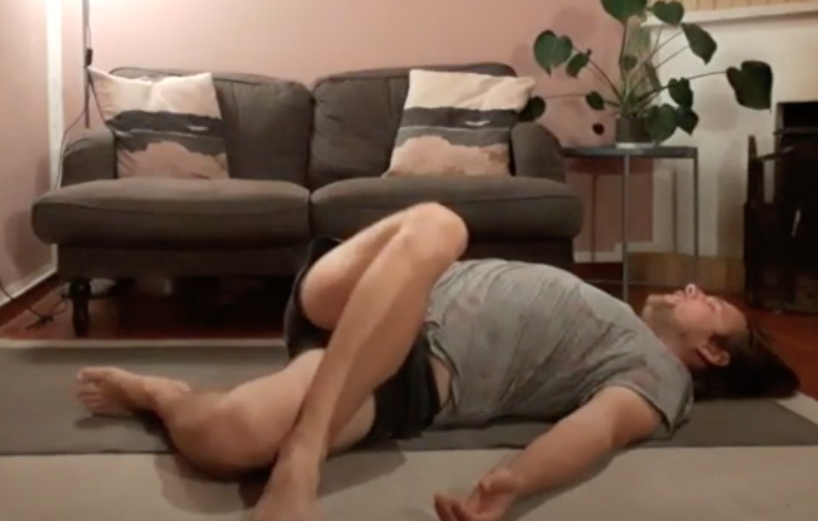
Reclined Twist
From here we can lower our right foot onto the mat on our left side.
This itself will give you a twist in your spine already.
If you feel the stretch and it’s already deep enough for you, that’s perfect, then you can stay here for now.
If you are looking for a deeper stretch, you can straighten your right leg and bring your toes towards your hands.
Your arms are leveled with the shoulders. And the latter should be staying on the mat as well.
Stay here for 3 minutes and then you can bring your legs together and put your feet into the mat.
Switching Sides
Now, we’re already half way there. Of course, we’ve focused on our right side at the moment. Now it’s time to focus on the other side.
I’m not going to repeat everything I’ve just mentioned of course, you can read it again and replace left with right and vice versa!
Remember that at any time, you should always hold the pose at the same length of time you did before.
This is to keep the balance within your body, rather than overstretch in one side and not stretching the other enough.
Savasana
Alright, now the time has come to completely relax. You can lay yourself on your back on your mat. Or your bed. It’s up to you.
If you do choose to do this from the comfort of your own bed, maybe you can already get ready to fall asleep!
It’s great to just doze off after your yoga session and get into dreamland right after a relaxing session.
If you still have a couple of things to do after your yoga practice, you can stay in Savasana for 5 – 7 minutes. Or even longer. This position in general can actually be done for as long as you’d like/prefer.


Oh my, this looks like a lot of work for me but I guess if I am really determined, them I can actually achieve what I want for my body and this free video and other pictures here are all very good. I feel like it will be very essential for me to keep fit. I have not seen many people who actually do yoga at night though.
Hi Suz, if you don’t feel like doing the work, know that yin yoga is actually a very passive yoga sequence. It’s focussing on tissue, rather than muscle. Meaning that you can just relax, while gravity is doing the work on you! It doesn’t mean that it’s not going to be challenging, but it definitely takes less of your effort. Enjoy!
Hello there – Thank for such a unique article on “Great Night-Time Yin Yoga Sequence and Free Video”. I had no cluse that there was something called night time Yoga. The Pre-Bed Time Yin was a really good reccomendation. I will try it tonight. Usually when I am searching for stretching excercises online, they are not so detailed so for a change it was refreshing to actually see the pics for each pose. Thanks again.
No worries JN, I hope you enjoyed the video and that you had a nice and lovely nap after!
Oh I love this Yin Yoga sequence for night time and awesome that I can practice it even when I am in bed. I often get into the Savasana posture when I get into bed, although I didn’t know that it was called that. I basically just try and do breathing in that position, so it would be quite easy to do reclined twits and reclined swan pose as well.
I will start with these before adding human hammock and variations as these appear to be more energetic to do in bed, but once I find a loop, I might try it as well.
Hi Line, I’ve got an article about straps if you are looking for a loop. Just know as well that it’s not that necessary to buy any props for this sequence. Human Hammock is a great position, but know that you can also do a leg stretch, which is the main purpose of this asana.