
Were you always a big fan of the dragon poses in Yin Yoga? Well, in this article we will be talking a bit about some dragon poses.
It will be quite a challenging sequence, but it’s so amazing for your legs to get a full stretch. It’s almost like a workout, but we’ll be breaking down connective tissues, rather than building up muscles.
And of course, I’ve taped this sequence as well. If you’d like to see it, you can keep on reading until the end.
Let’s get it started!
#1 Low Dragon
This is probably the easiest dragon pose you can do. So if you are starting out with yin yoga, this might be a great dragon pose to start with. Although, it’s already quite a challenge on its own.
In most sequences you’ll be starting off in High or Low Dragon. As this is in general a starting position for all of the other dragon poses.
And what I like in particular is that low dragon is not just as challenging as high dragon, it also stretches a lot more areas in your body.
Benefits of Low Dragon
First of all, low dragon is great for a lot of things. It stretches the groins, the upper legs, the neck and shoulders, etc.
In a way it is an ideal hip opener, especially if you are not that flexible just yet. It opens the hips, but very gently. Causing a soft stretch, rather than fulling this pulling strain.
Another benefit is that you’ll get a great stretch in your Psoas and Sartorius.
The latter gives a lot of aid in opening your spine. Making that you’ll also open up the lower back and pelvis.
If you are having back pain (sciatica), this might give you some relieve. Although I’d really like to mention that you’d have to go into this pose very gently and softly. This just to make you aware of your movements and to stop whenever you feel pain.
Contra-indications for Low Dragon
People with ankle or knee injuries could better use a variant of Low Dragon. They can use pillows or blankets to put underneath knees and ankles to make them feel comfortable.
People with tight hips, be very gently as well. Maybe don’t go too deep into this position and focus on stretching the Psoas on your back leg.
How To Get Into Low Dragon
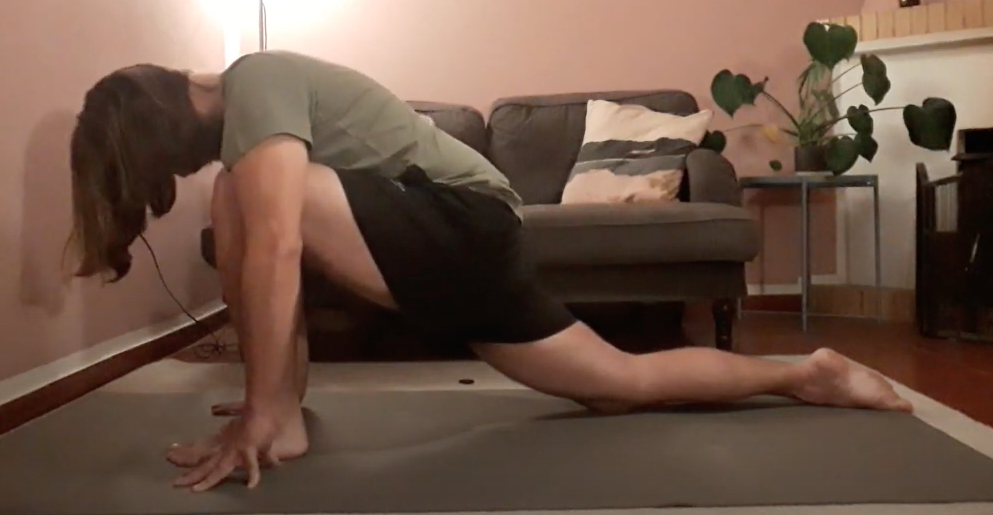
- Go into Tabletop Position (knees underneath hips, hands underneath shoulders)
- Put one foot in between your hands (you have to do both sides, so it doesn’t matter which foot you start with)
- Slide your back leg further away from you (Just make sure your knee floats somewhere over the ankle or toes)
- Hands are staying on the floor
- lower your head and let it relax
- Stay here for about 3 – 5 minutes
Options for Low Dragon
What I really love to do in this position, and a great tip for those who’d like to protect their knees a bit more: using pillows or blankets.
It’s really easy, the knee that’s placed on the mat goes on top of a blanket or pillow. This will give you some extra support and feels really great. Especially if you’ve got quite a hard floor.
Other options are to put your hands on your blocks. This you’d normally do with High Dragon, but if your arms are short and you don’t want all your weight on your raised leg, this is a great option too.
#2 Twisted Dragon
A great variation to follow low dragon is Twisted Dragon. In the previous position you’ve already opened your hips a little, so you’ve already made some space to go deeper.
In this position you won’t only go deeper into the hips though, you’ll also be getting a great twist!
Benefits of Twisted Dragon
The benefits are basically the same as those for Low Dragon. The only addition is that it’s also a great way to get a twist in there, to make sure you also stretch your abdomen.
Contra-Indication for Twisted Dragon
These are the same as for Low Dragon.
How To Get Into Twisted Dragon
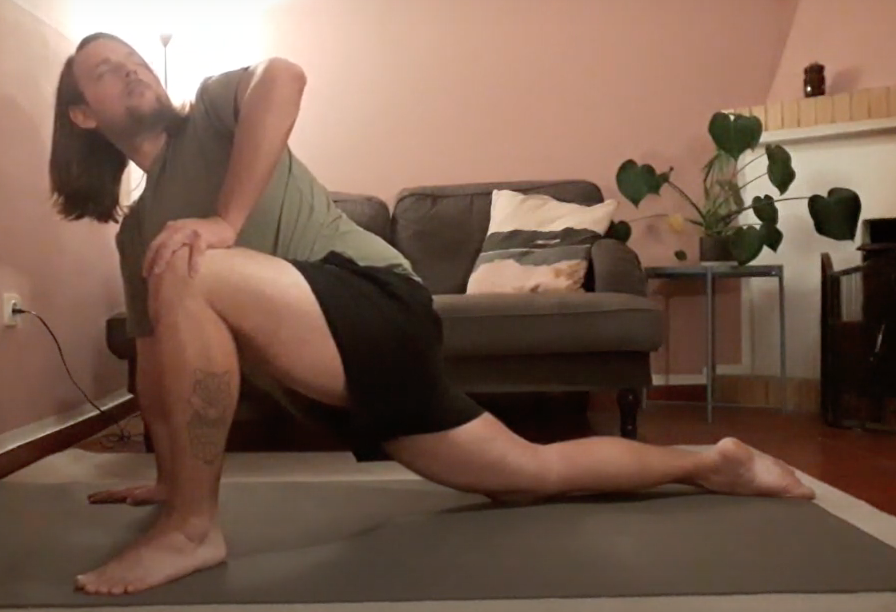
- Start in Low Dragon (Right Foot in between hands)
- Bring your right hand on top of your knee
- Push your shoulder up with your right hand
- Your shoulders open up and you twist yourself to the right side
- Stay here for 3 minutes
- Go into Dragon Split afterwards
Options for Twisted Dragon
Same as for Low Dragon.
Plus: You can put your toes into the mat and straighten your lower knee. This will put a bigger strain on your hip, so if you have an issue with that area, please use the normal variation of Twisted Dragon.
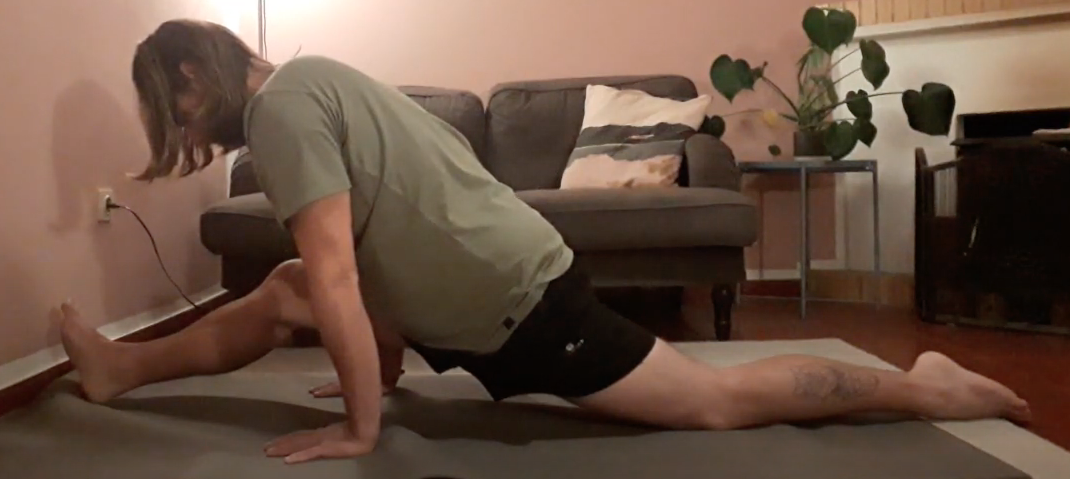
#3 Dragon Split
And then finally! Going into a Dragon Split.
Normally the dragon poses really focus on your groins and hips. This one however, is going to focus on your hamstrings. Which is amazing to finish off with.
We’ve actually stretched most of our muscles in our legs, except for the back of them! If you do a full stretch for your legs, I’d definitely add this position as well.
Benefits of Dragon Splits
This position in particular is amazing to train yourself to go into full splits. Of course, be very gentle on yourself and make sure that you don’t go to deep too fast.
Another thing is that you will loosen up your hamstrings with this asana as well. Those who have very tight hammies, this might be a great position to do on maybe even a daily base.
There are different variations, so don’t worry, if the hamstrings are too tight, there will be a way for you to go into the position.
Contra-Indications for Dragon Splits
If you have really thighs hips or hamstrings, it might be good to have a look at the different options. If you still don’t feel the right position for you, don’t worry, there are other positions you can also do.
If you are in a yoga class and you do feel that the position goes too deep, you can always go in childs pose, no judgement from your yoga teacher!
How to get into Dragon Splits
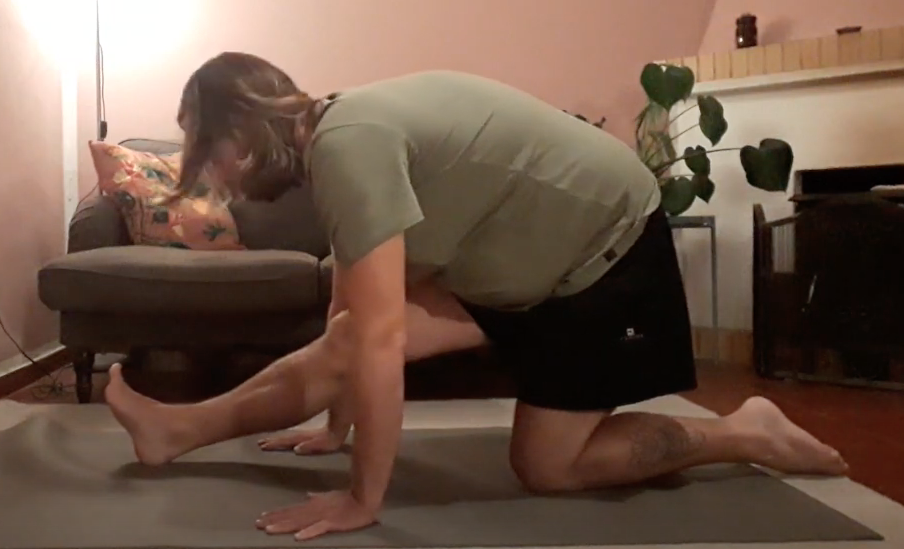
- Go back into Low Dragon
- From here, bring your hips backward
- This while you put your front heel into the mat
- Place your hands on the mat and lower your upper body forward
- You can stay here or go deeper by bringing your front leg forward
- Stay here for 3 minutes
Options for Dagon Splits
If you can’t reach with your hands towards the mat, you can put two blocks to each of your side and put them on there.
Also, if you’d like to go deeper but still keep your muscles relaxed, you can put a bolster or a block underneath your front leg. Then you can also put a block underneath your back hip.


I’ve done some yoga in the past. I still do a few poses. I forgot about this pose. It feels great to loosen up the hips and thighs. I’m going to start adding it to my routine. What is your recommendation for people with osteoporosis? Are there specific safe poses for that?
Hi Paula, it’s a shame to hear that you have osteoporosis. Hopefully, it’s not too bad. I want to mention that it’s not easy to do yoga with osteoporosis. It also depends on which level you’ve got this bone disease. If you often break something, I would definitely restrain from going too deep into positions. Even though you might not feel a lot of stretches, it’s better to take a step back, rather than going too deep.
Specific safe poses is a bit hard to say. This really depends on how osteoporosis is manifesting itself. But as I mentioned, it’s really a case of just being careful and not going too deep.
You can always book a private online yoga class if you’d like to check what is possible for you!