
Turtle Pose, it might not come up into your mind as a very special pose, but it kind of is. I mean, how many people do you know of can bring their arms under their legs and get completely to the ground?
Probably not that many, am I right?
And even though I’m not teaching yoga to make sure that you can show off on social media, it’s always nice to get deeper into your practice. It doesn’t only show that you are making physical process, but as they say: a flexible mind in a flexible body.
Isn’t it?
There are a couple of variants to Turtle Pose or Kurmasana, so we’ll have a look at both of them in this article.
And don’t forget, always be safe when doing yoga. Make sure that you warm up properly, especially your muscles. And that you don’t overstretch. So, yes pain no gain.
What is Turtle Pose Good For?
Let’s start by looking at the physical benefits of Turtle Pose.
First of all, this asana is a great one for when you’d like to gain some flexibility. Which you will need if you’d like to go in positions like Dancer Pose.
The areas that are focused on are the hamstrings and the hips. Although you’ll also be feeling it a little in your lower back and your thighs. For those with tight hammies, be careful that you don’t overdo it!
While working on these muscle groups, you’ll get also another benefit. This is probably one of the ultimate asanas to withdraw your senses (Pratyahara).
When you are bending down, basically folding yourself in two, you’ll be able to withdraw yourself completely. You’ll find yourself in such a position where it’s hard to look at others, listen to your environment, etc.
Your senses are completely shut down (kind of). Meaning that this asana really lives up to its name: Turtle Pose.
But now, let’s have a look at how you can go deeper into your practice and achieve this yoga pose.
Turtle Pose Preparation
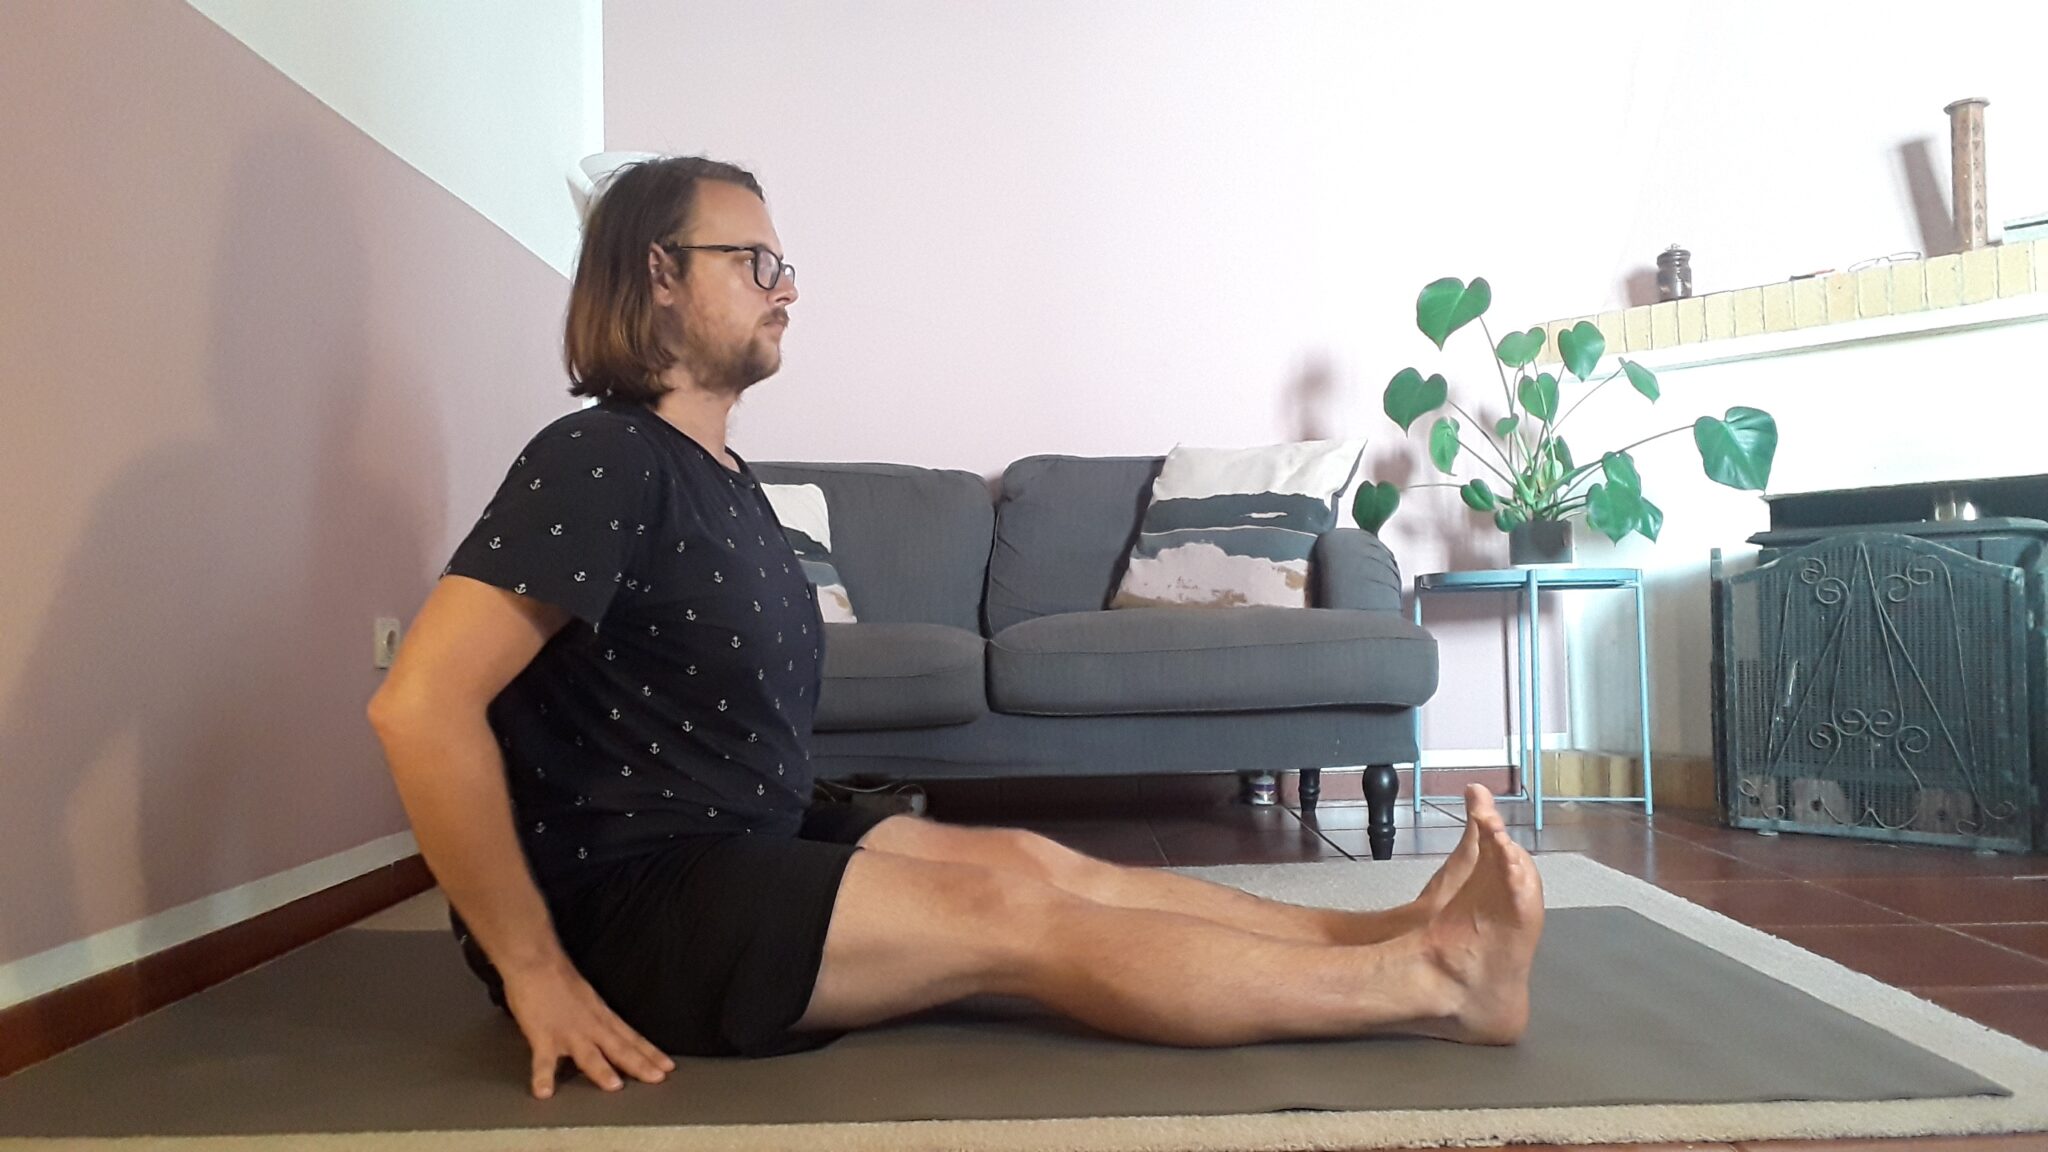
Staff Pose (Dandasana)
This is an easy pose, but yet very vital when you are preparing yourself to go into Turtle Pose.
It’s simple: you straighten your legs in front of you while you are seated.
There are a couple of variations here that you can do.
You can keep your hands next to you, making sure that you have a lengthened spine. If your arms are a bit shorter you can put your hands on a block. This will make sure that you won’t slouch.
Another trick is to put your thumb, index, and middle finger diagonal from your hips. This is a great exercise for people who have back issues and like to train their muscles. It will be uncomfortable in the beginning, but just try to do it. Your spine will thank you!
Another great option for this asana is Paschimottanasana. And I’m sorry, but I’m not even going to try to translate it. It’s such a long word in English that it’s better just to stick with the Sanskrit name.
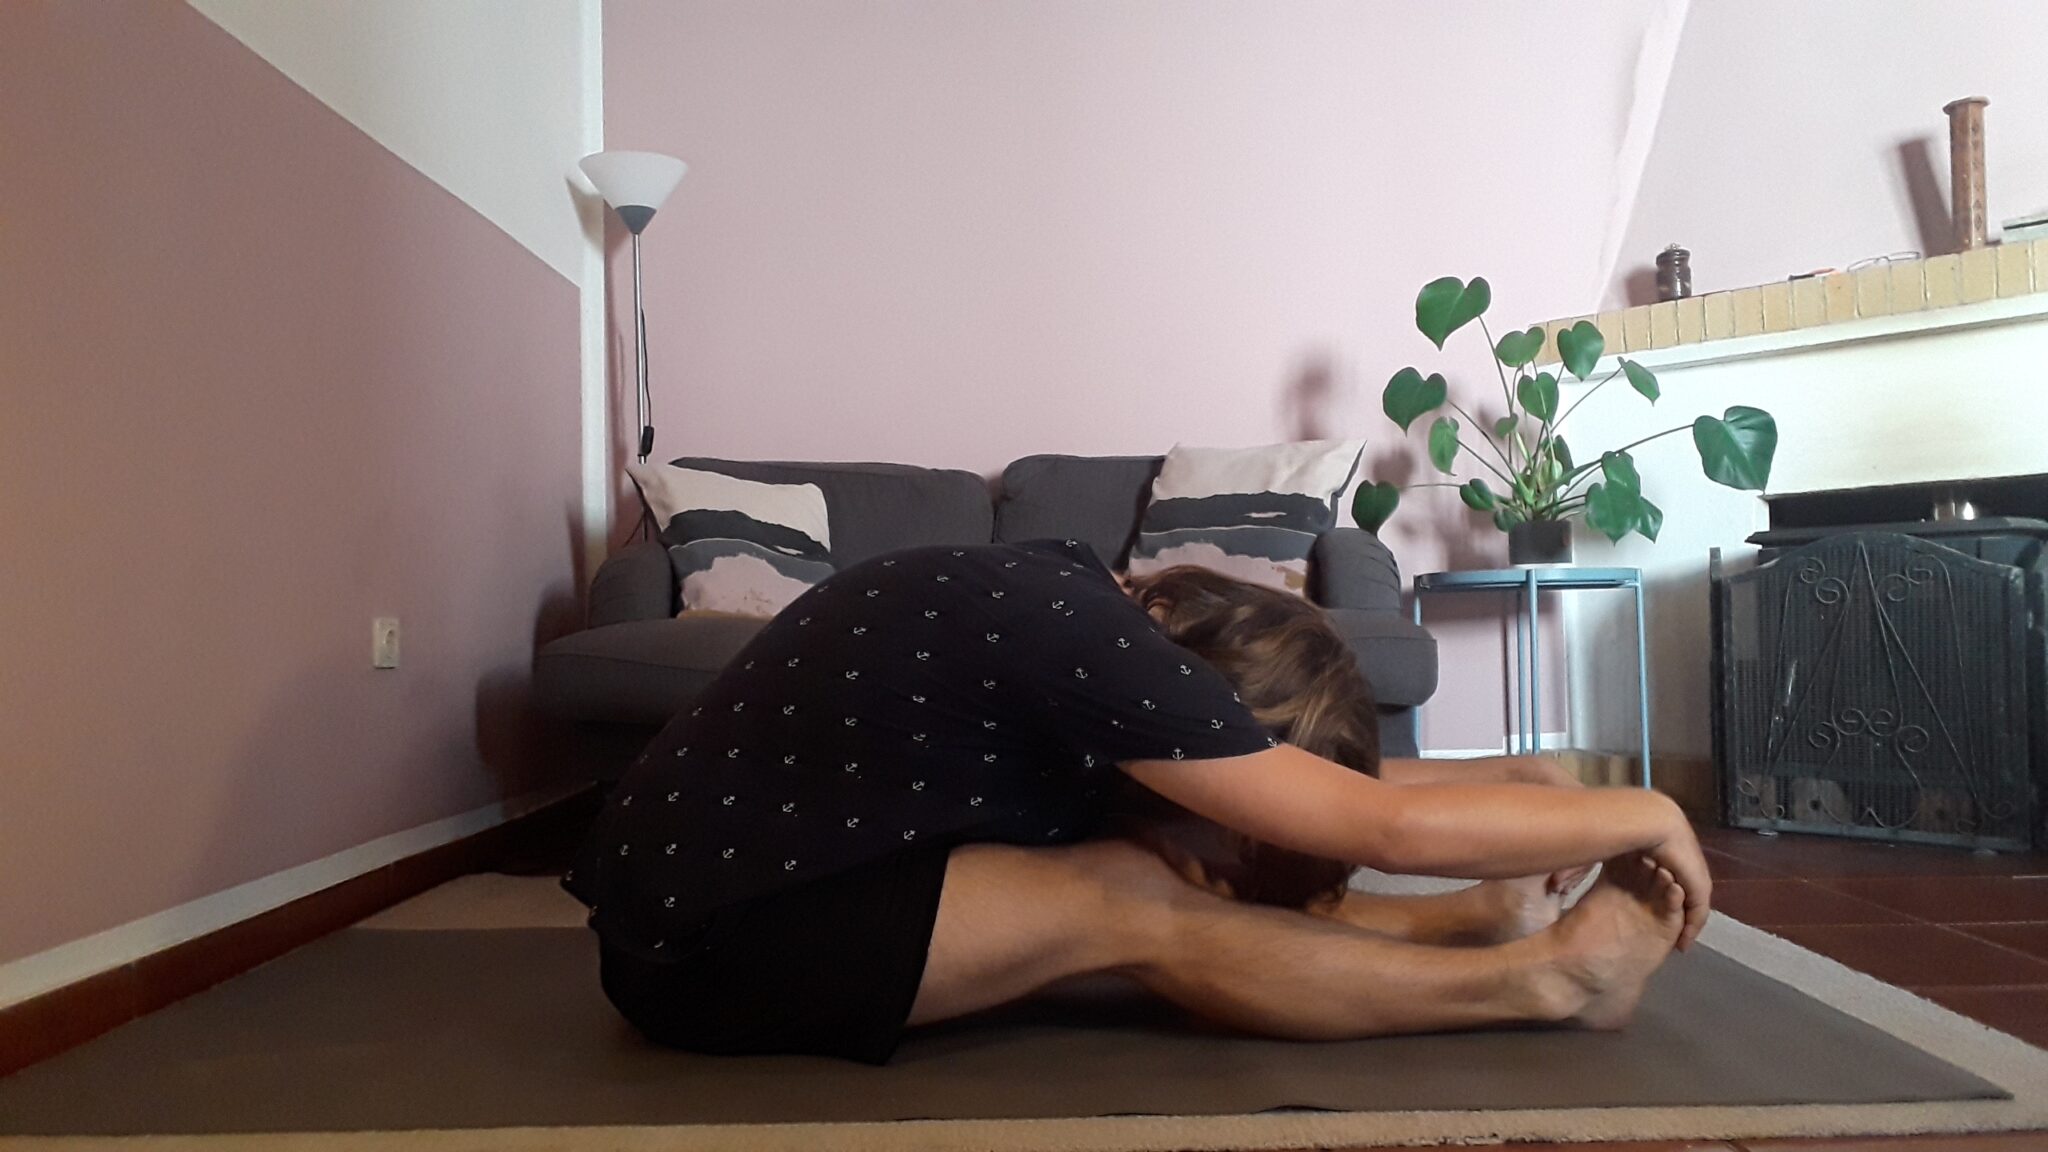
For this asana, you just bend forward. But to explain it more into yoga words: On the inhale, you lengthen the spine as good as you can, and on the exhale you bend forward.
Your hands can fall wherever they want. If it’s next to your knees, that’s okay. If you can take your feet, that’s also fine.
For those with very tight hammies, make sure you bend the knee just a little. This will take away a bit of stress on your muscles. Just make sure you don’t make it too easy for yourself, you do need to feel a stretch.
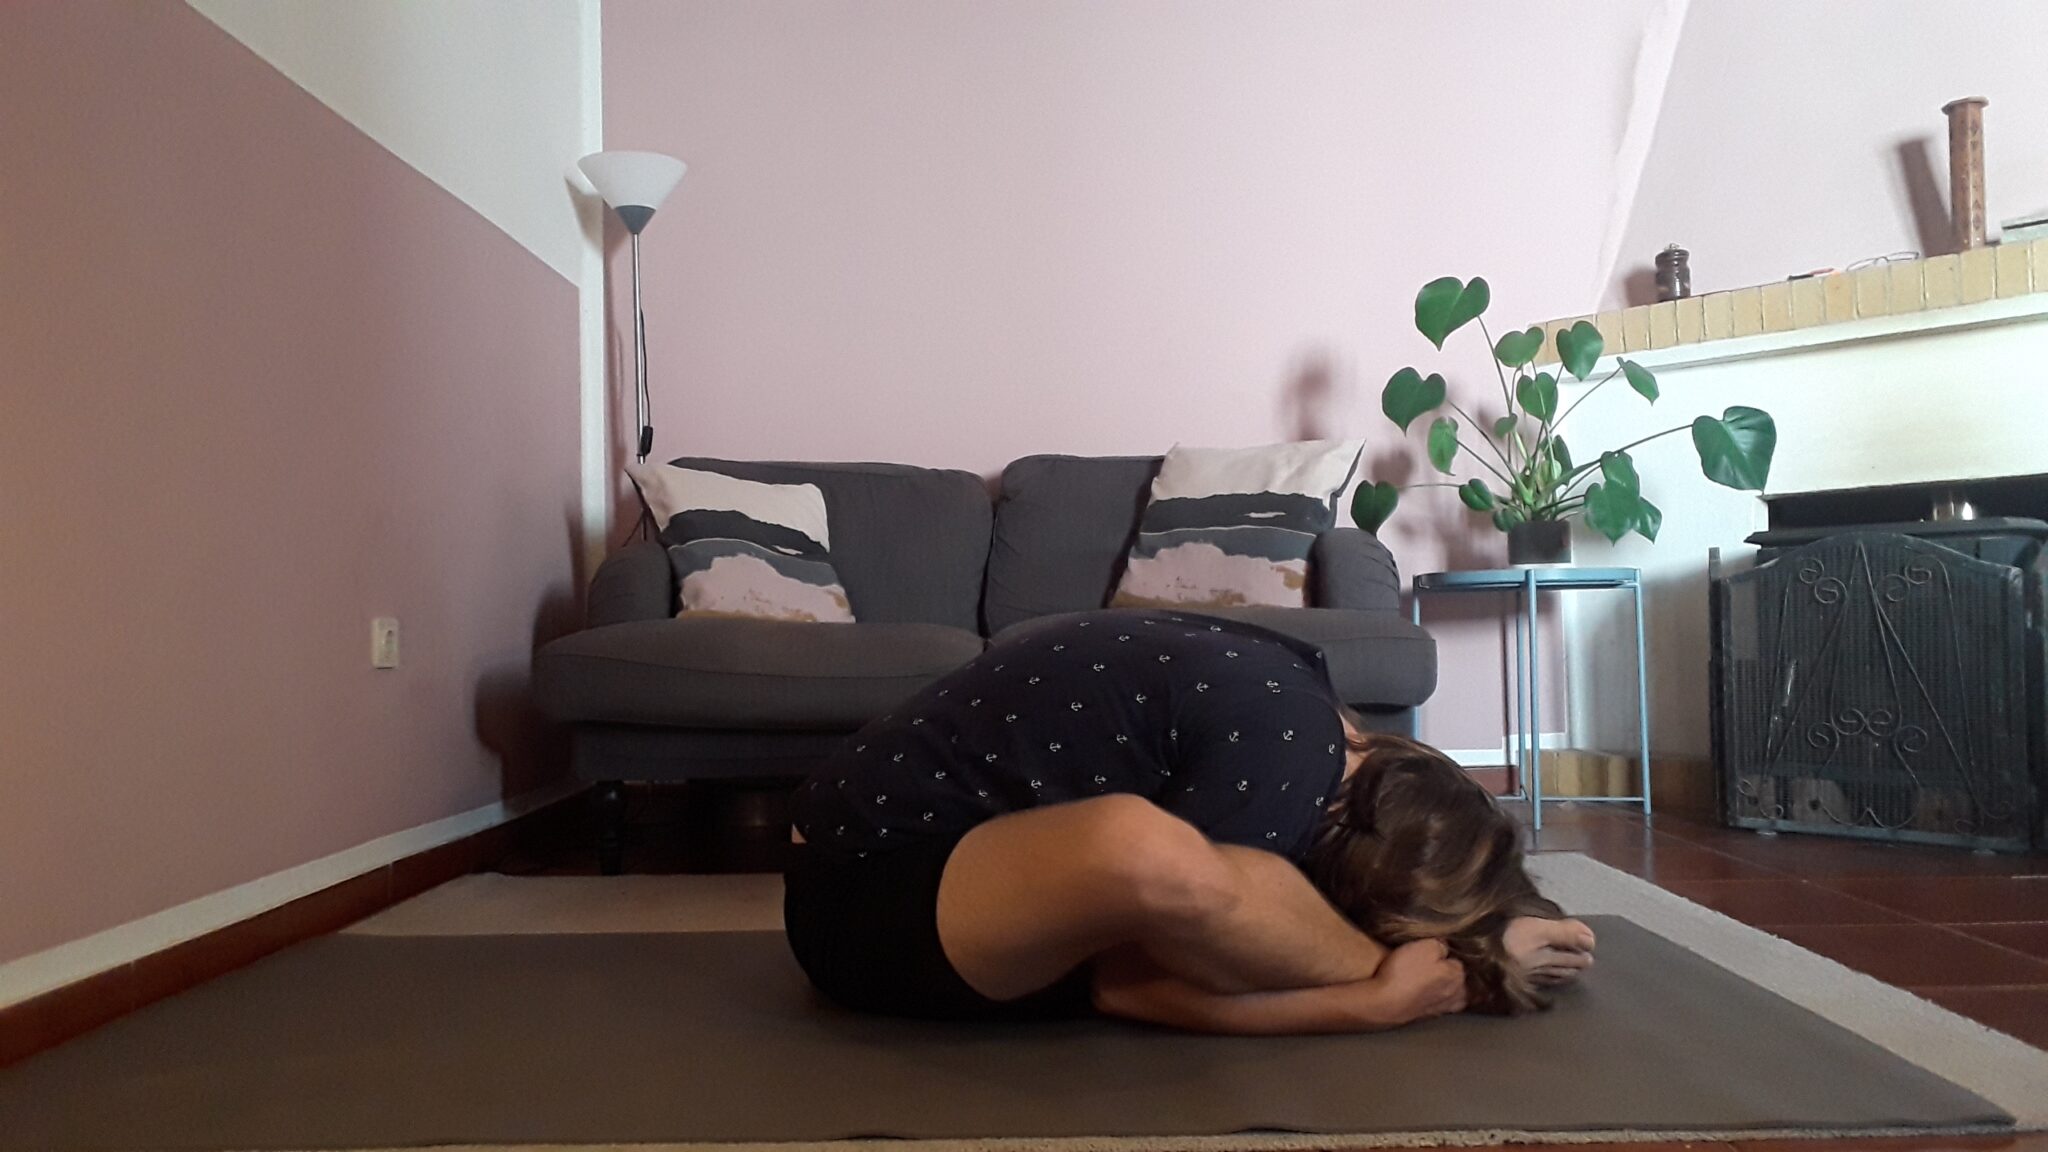
Buttefly Pose (Baddha Konasana)
Quite a popular pose in all kinds of different yoga styles. So if you are not that new to yoga, you’ll probably have done this asana already.
For me personally it’s one of the greatest hip openers as it’s so simplistic, yet very powerful.
There are numerous variations on this pose, but for the purpose of getting into Turtle pose, we’ll look at just one of them for now. If you do want to know more forms of Butterfly poses, leave a message in the comment section below! And I might write an article about it in the future.
For this specific butterfly pose, we are going to make sure that your feet are together while in a seated position. They don’t have to press against each other, they can just be relaxed.
The legs need to form more or less a diamond shape. So rather than bringing the feet towards you, you can move them away from you.
The latter will make sure that you are going to be able to bend deeper. Making it quite important to move those feet away!
And then when you are in the right position, you inhale and lengthen the spine and bend forward on an exhale.
And that’s all there is to it.
Turtle Pose Preps
The next couple of poses are literally called Turtle Pose Prep. So for this reason I can’t give them any other name than this. And they do what they say they’re going to do: prep yourself for turtle pose.
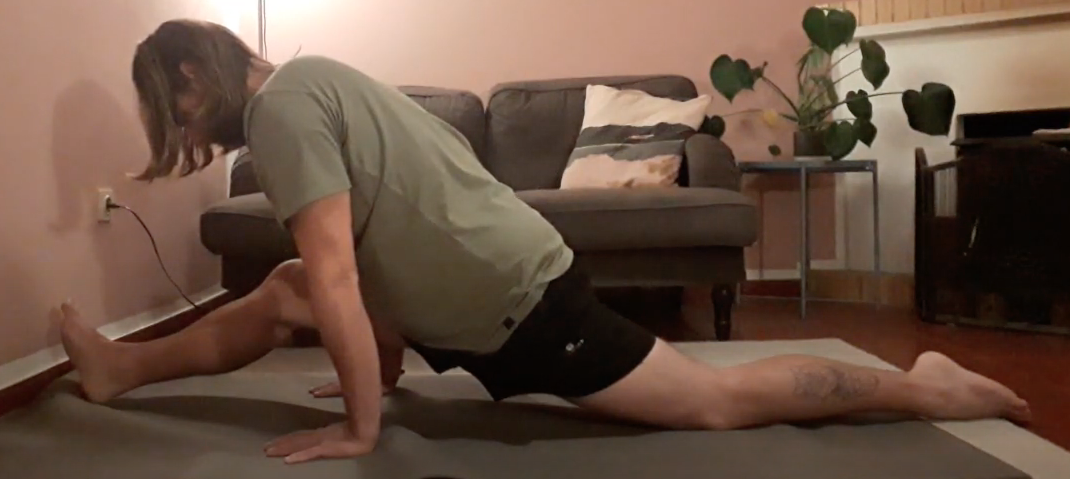
The first one is also the first step of the prep. While you are seated you bend you put your feet into the mat and bend your knees.
But this is not where it stops just yet. No, no, we are going a bit further. While you are coming down a little on the exhale, you bring your arms forward.
As you can see, this is already a great prep to go into Turtle Pose.
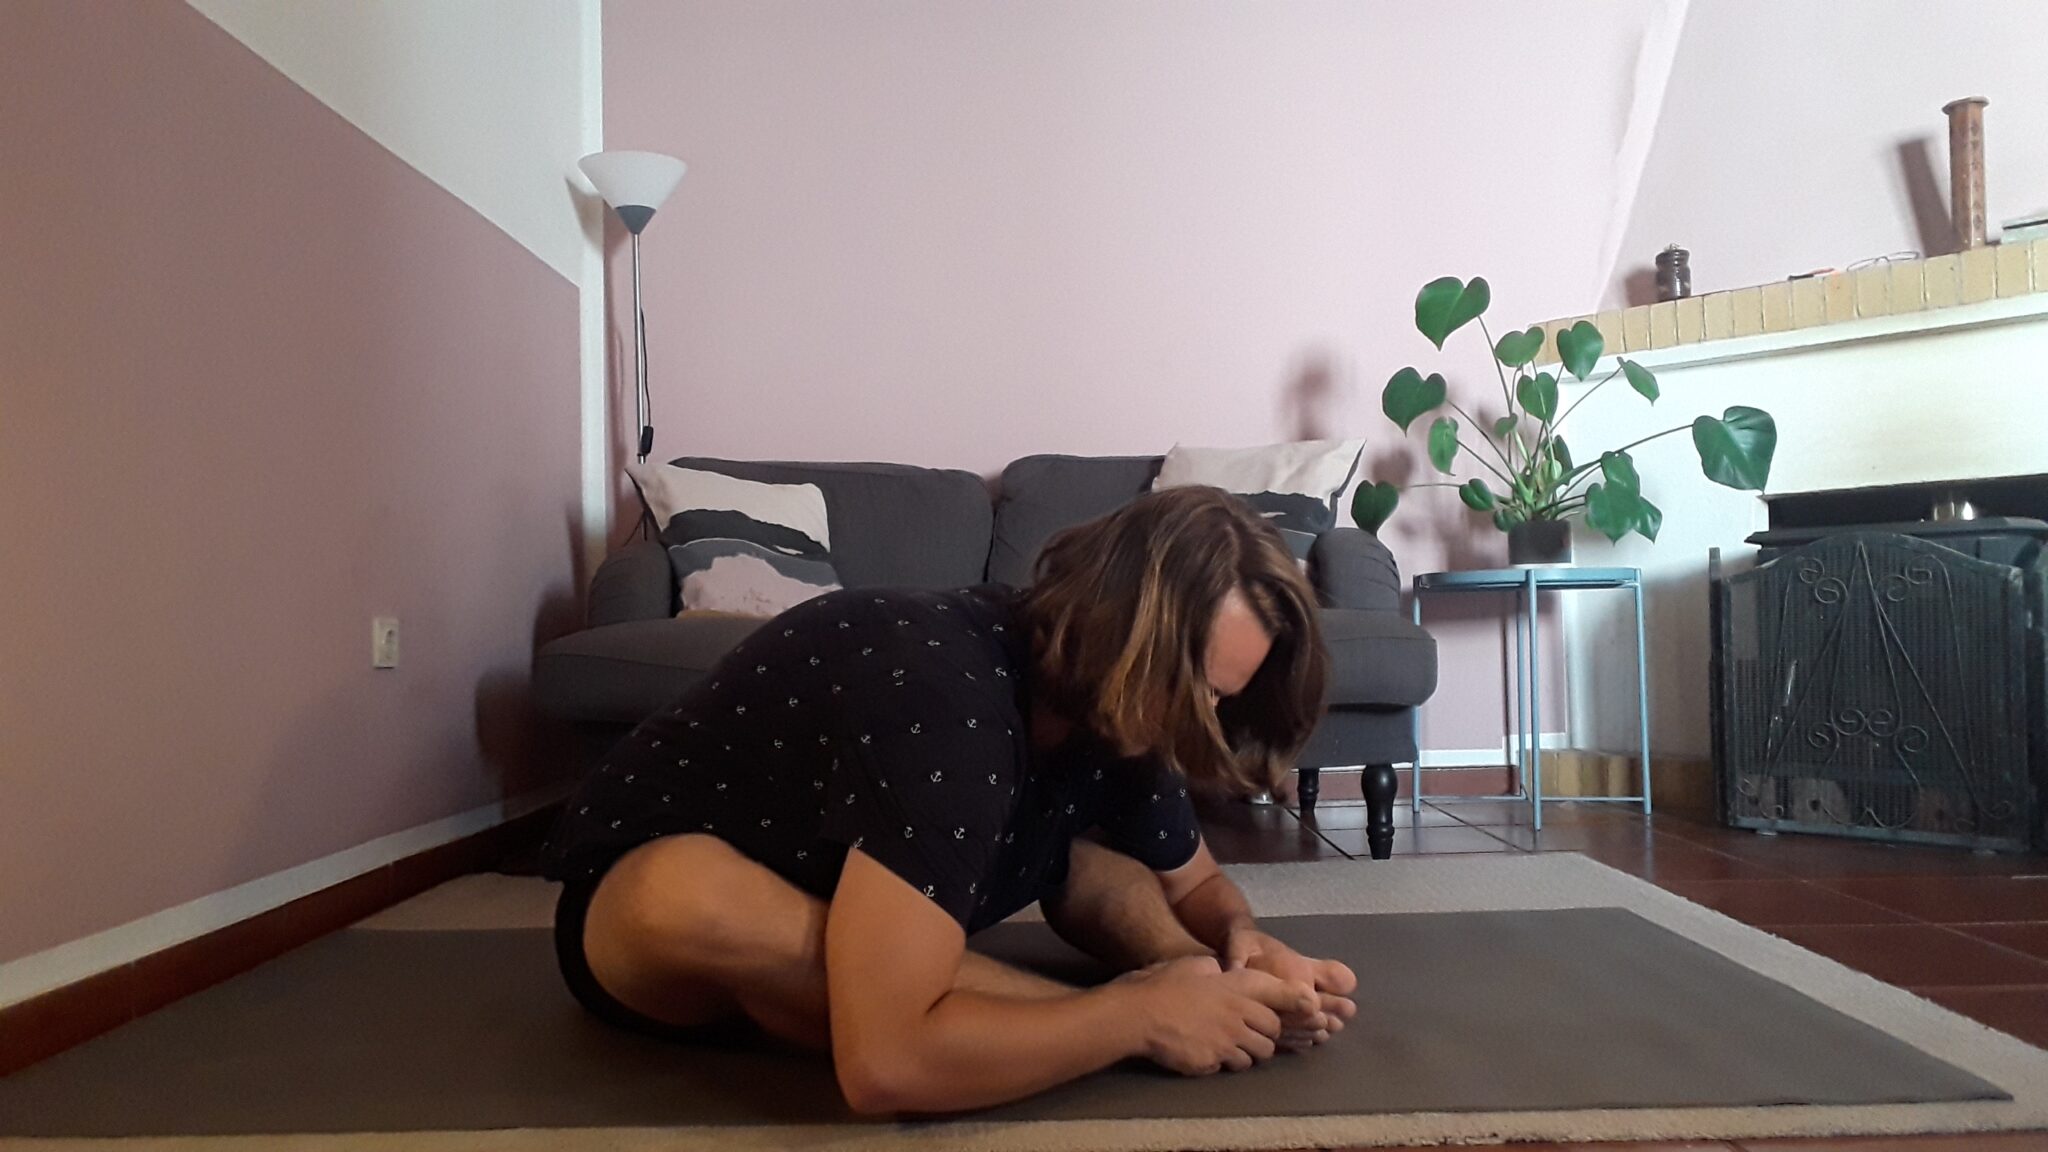
The next variation goes a little bit deeper. You repeat the previous steps, but now you bring your arms underneath your legs. You keep the knees bend though. For now.


Garland Pose (Malasana)
Another great position to incorporate into your Turtle Prose Prep is Garland Pose. I’ve already dedicated this position into my Crow Pose article, so I advice you to check it out to see more about this asana.
This position is great to open your hips and has a lot of benefits as well. So, make sure that you do a couple of squats in your yoga practice. They can never hurt!

Getting Into Turtle Pose
Now the moment has arrived. The moment you all have waited for! How do you get into Turtle Pose?!
Well, first of all, it’s good to know that there are a couple of options. One is a bit easier, the other is better if you’d really like to withdraw yourself completely.
However, they are both equally great and if it’s possible, try them both!
Option 1
For this one you don’t have to bring your feet together. You just need to widen your legs a little bit while you are in a seated position.
When you did this, bend the knees just a little. This is really necessary as you need this space to bring your arms underneath.
After you’ve opened your legs a little. Lengthen the spine on an inhalation and bend forward on an exhalation.
Now you can bring your arms underneath the opening underneath your knees. You can just stretch your arms completely, or you can decide to wrap them on the outside of your legs.
Or if you’d like to go even deeper you can bring them behind your back! But this is definitely more for the flexible people among us.
Option 2
For this option you almost have to do the exact same thing. Except that here, you’ll be starting from butterfly pose. You know, that position we talked about a little bit up here in the article.
You bring the feet together. Make sure that your legs are kind of in a diamond shape and then you bend forward.
The same options count here as well: You can wrap your arms around the outside of your legs.
You can keep the arms straight.
Or you can bring your arms behind your back.

Coming Out of Turtle Pose.
To come out, you really have to be gently. First, bring your arms back to the inside of the legs.
You might hurt yourself if you come up before you bring your arms back in.
When you’ve done this, make sure that you put your hands onto your mat and walk back up very slowly.
Really take your time here to come out of this position. You might be in this asana for a couple of minutes meditating. Which means that it’s best to slowly transition back into a different position.
Conclusion
That’s about it again for yet another great asana you can do yourself at home. Of course, always be gentle and safe and make sure you incorporate this asana into a whole practice.
Would you like to know how? Book an Online Private Yoga Class with me!
And for now…
Nama-stay wonderful!
Oh what a great article and I love the instructions for the Turtle Pose. I am very interested in yoga practice and incorporating the practic into my routine. I love that you can come into my home via online instead of me having to travel. That just makes it much easier and the privacy is a bonus. Love it!
I’m glad you enjoyed the article Rina! Hope to see you soon in one of my private classes!